Welcome to the world of creativity and self-expression through sewing! This comprehensive beginner guide will explore making your own sewing patterns. From taking precise measurements to crafting custom designs, you’ll journey to create garments that fit perfectly and showcase your unique style. Learn more about “how to make your own sewing patterns.”
To create your sewing patterns, begin with precise measurements. Draft your pattern on paper, considering design elements and adding seam allowances. Test it with a mock-up in inexpensive fabric. Adjust as needed. Finally, transfer your finalized pattern to material and enjoy crafting custom-fit garments that express your style. Here is a guide on Crafting trends you need to know about in 2015.
Read this article to unlock the world of custom sewing patterns. Whether you’re a beginner or a seasoned sewist, discover essential techniques for creating perfectly fitting garments. From accurate measurements to pattern drafting and fabric selection, this comprehensive guide empowers you to design and sew unique clothing that reflects your style. Check this if you want to learn how to read a sewing pattern.
Advantages of Custom Sewing Patterns
Here are some advantages of Custom Sewing Patterns:
Getting everything rolling
Before jumping into the advantages, we should initially comprehend custom sewing designs. Custom sewing designs are formats that guide you in slicing and sewing texture pieces to make articles of clothing that fit you impeccably.
Advantages of Custom Sewing Patterns
Excellent Fit: The main benefit of custom sewing designs is accomplishing an ideal fit. You can end alterations and garments that don’t fit right because these patterns are designed with your measurements in mind.

Comfortably hugging your body, your creations will boost your confidence.
Limitless Inventiveness: With custom sewing designs, your imagination has no limits. You can choose from various fabrics, colors, and embellishments to create clothing that reflects your style.
Whether making a wedding dress or relaxed wear, custom Patterns engage you to be the fashioner.
Attractive Closet: Burnt out on wearing similar styles to everyone? Custom sewing designs empower you to construct a stand-out closet.

Create articles of clothing that express your character and stand apart from the group with exceptional pieces.
Expertise Advancement: Creating patterns is a great way to improve your sewing skills.

You’ll find out about design drafting, article of clothing development, and fitting strategies, which can be important for both individual ventures and potential vocation open doors in the style business.
Cost-Effective: While sewing clothes can help you save money in the long run, custom sewing patterns can be incredibly affordable.

You won’t have to spend much money on commercial designs for each project, and you’ll be able to get the most use out of your fabric and reduce waste.
Required Materials and Instruments
Now that you’re anxious to set out on your custom sewing venture, how about we investigate the fundamental materials and instruments you’ll require:
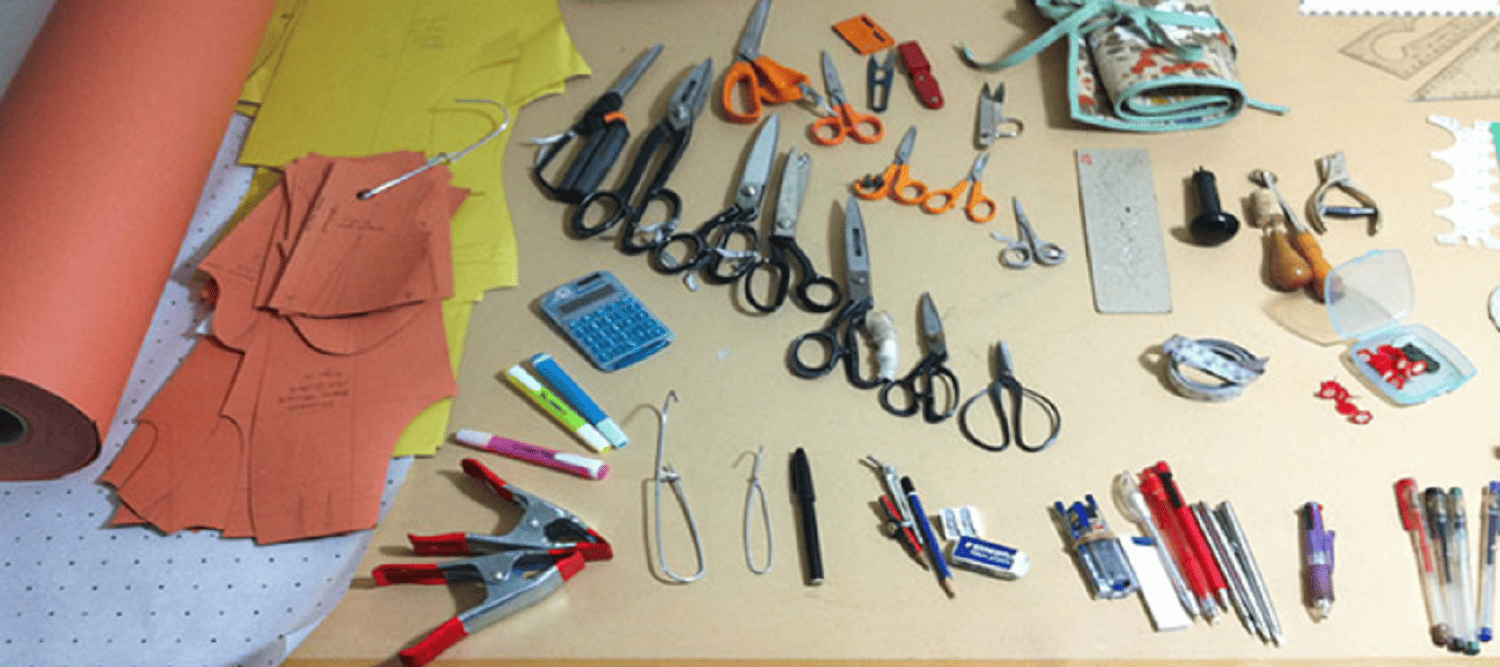
Estimating Tape: Precise estimations are the underpinning of custom Patterns, so put resources into an excellent estimating tape.
Design Paper: Design paper permits you to draft and adjust your custom Patterns. It’s typically sold in rolls or sheets and is fundamental for making layouts.
Drafting Instruments: Instruments like rulers, French bends, and a set square are fundamental for defining exact boundaries and shapes on your Pattern paper.
Pencils and Markers: Use pencils to draft starting lines and markers to finish your Patterns.
Fabric Shears and Scissors: Great quality scissors and texture shears are urgent for precisely cutting Pattern pieces and texture.
Pins and Loads: Pins keep texture layers intact while loads forestall design paper from moving during cutting.
Sewing Equipment: A dependable machine custom-made for your sewing needs is fundamental.
Iron and Pressing Board: Pressing seams and achieving a polished finish require these.
Notions: To finish your projects, gather ideas like thread, zippers, buttons, and interfacing.
With these materials and devices close by, you’re prepared to plunge into the universe of custom sewing designs and partake in their endless advantages.
Figuring out the Rudiments of Sewing Patterns
Before you begin making custom Patterns, understanding the fundamentals of sewing patterns is urgent. This information will be a strong starting point for your custom Pattern-making venture.

Design Wording: Know regular Pattern terms for pattern, crease recompenses, grainlines, darts, and scores.
Changes to the Pattern: Figure out how to make essential Pattern changes, such as protracting or shortening, to fit Patterns to your body shape.
Perusing Business Patterns: If you’ve previously worked with business designs, comprehend how to peruse and decipher them. This information can be applied while making custom Patterns.
Reviewing Patterns: For the people who intend to make garments for others, comprehend how to grade Patterns to various sizes.
How to Make Your Own Sewing Patterns: A Step-by-Step Guide
You can make perfectly fit clothes and show off your style using your sewing patterns. Follow this bit-by-bit manual to make custom Patterns for your estimations and inclinations.
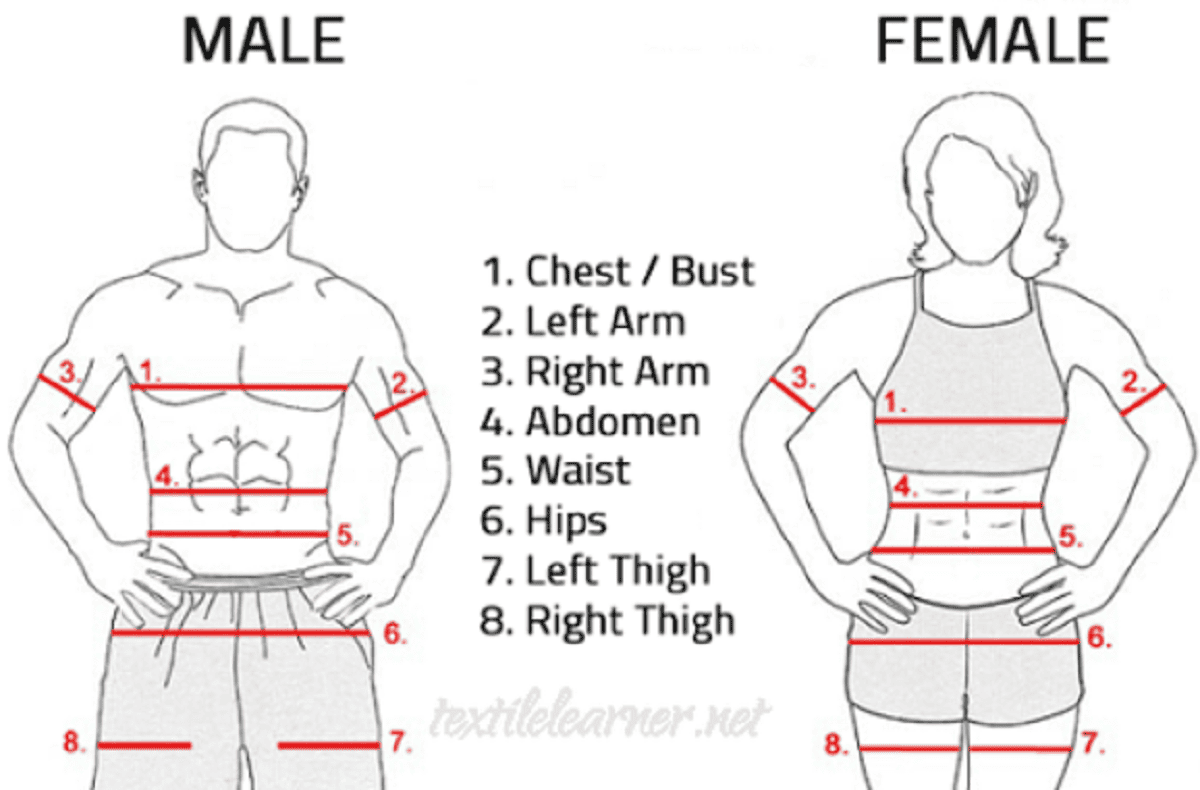
Step 1: Taking Your Estimations
Precise estimations are the underpinning of a well-fitting piece of clothing.
Follow these means:
1. Accumulate Supplies: You’ll require an adaptable estimating tape, a companion or a full-length reflect, and a notepad to record your estimations.
2. Wear Fitted Dress: Wear well-fitting garments or underpants to get exact estimations.
3. Measure Central issues:
- Bust/Chest: Measure around the fullest part.
- Waist: Track down your customary waistline, typically the tightest point.
- Hips: Measure where your buttocks and hips are widest.
- Shoulders: Measure from the foundation of one shoulder to the next.
- A manageable distance: From the shoulder to the wrist, measure.
- Underarm: Measure from your groin to the ideal gasp length.
4. Record Estimations: Note every estimation and guarantee they are exact. Take different assessments to affirm.
Step 2: Make a Basic Pattern on Paper
Now that you have the measurements, you will make a basic pattern on paper:
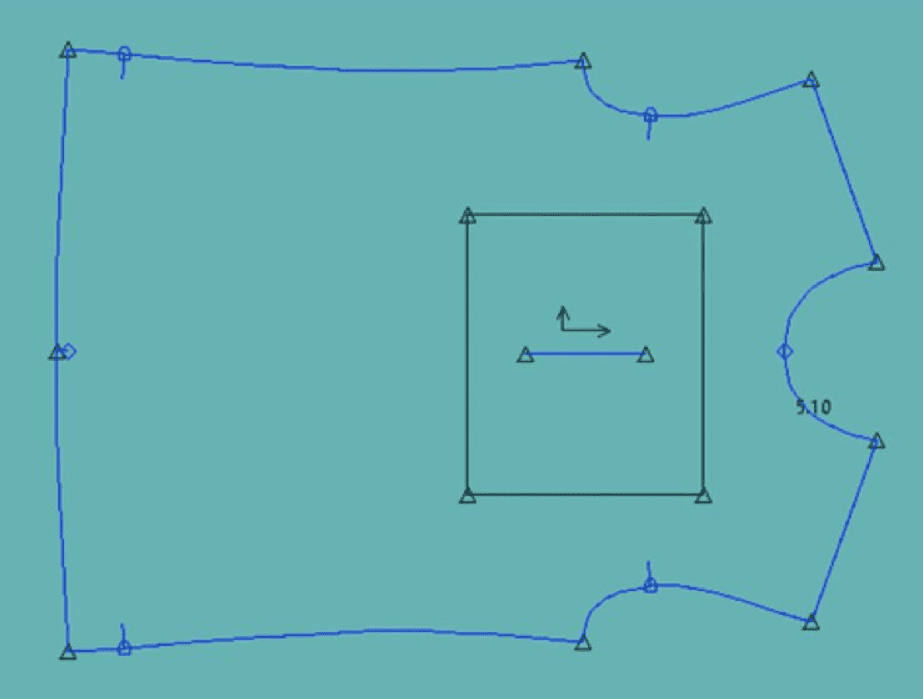
1. Materials Required: You’ll require design paper or any vast, unlined paper, a ruler, a set square, a French bend (discretionary), and pencils or markers.
2. Make an Outline: Begin by defining a vertical and level boundary converging at the right point. The upward line addresses the middle front (CF) and focus back (CB) of your clothing, while the even line handles the waistline.
3. Mark Central issues: Mark essential points along the CF and CB lines with your measurements, such as your bust, waist, and hip measurements. Add crease recompenses to these estimations.
4. Draw Essential Shapes: Draw the basic shapes for your garment based on your measurements. For instance, draw a bend for the armhole and a straight line for the side crease. A French angle can be helpful for smooth curves.
5. Add Subtleties: Contingent upon your plan, add subtleties like darts, creases, pockets, or some other plan components.
6. Mark and Cut: Mark your Pattern pieces (e.g., front bodice, back bodice) and cut them out cautiously. Make sure to show the grainline bearing on each piece.
Step 3: Cutting the Pattern Pieces
With your paper designs prepared, now is the ideal time to move them to texture:

1. Assemble Materials: You’ll require your texture, design pieces, texture shears, and pins.
2. Spot and Pin: Place your fabric, right sides together, if necessary, on a flat surface. Put your Pattern pieces on the texture, adjusting them to the grainline course. To keep the pattern pieces in place, pin them to the fabric.
3. Carefully cut: Cut around the pattern pieces with care using fabric shears, following the outline. A garment that fits well requires precision in the cutting process.
4. Move Markings: The fabric pieces should be covered with pattern markings, such as notches or darts.
Step 4: Closing a Model
Before cutting into your last texture, it’s wise to close a model (otherwise called a muslin or toile) to test the fit and plan:

1. Plan Model Texture: Utilize cheap muslin or a comparable texture for your model.
2. Close the Model: Adhere to the sewing directions as you would for your last article of clothing. Give close consideration to crease stipends, darts, and some other subtleties.
3. Give It A shot: Try on the mock-up after sewn. Evaluate the design, comfort, and fit. Make a note of any changes required.
Step 5: Making Adjustments
Based on how the mock-up fits, your pattern might need to be changed in the following ways:

1. Change Crease Stipends: If the model is excessively close or accessible, you can change crease stipends like this.
2. Change Darts or Creases: If darts or creases don’t sit accurately, roll out fundamental improvements to their positions and lengths.
3. Refine Plan: If you want to change the plan, this is the ideal opportunity to make it happen. Roll out any outstanding improvements to the Pattern pieces.
4. Make an Updated Pattern: Move the changes from the model onto your paper design. Guarantee all pieces match, and that crease remittances are reliable.
Step 6: Finalizing Your Pattern
After making the necessary adjustments, you are prepared to finalize your sewing pattern:

1. Follow the Last Pattern: Tracing the revised pattern pieces on new tissue paper or pattern paper. Name them.
2. Add Indents and Markings: Incorporate scores, grainlines, and other vital markings to assist with texture arrangement and gathering.
3. Store Your Patterns: Keep your finalized patterns safe, ideally organized in envelopes or pattern storage sleeves.
See Also: How To Hem Pants Without A Sewing Machine: A DIY Guide
How to Make Your Own Sewing Patterns: Tips and Deceives for Better Sewing Patterns
We have mentioned some fantastic tips that you can try. Take a look. Making better sewing designs is fundamental for accomplishing an ideal fit and working with various textures.

Here are a few hints and deceives to help you on your Pattern-making venture:
- Finding the Perfect Match Exact Estimations: Use an adaptable estimating tape for precise body estimations. Measure on different occasions to guarantee exactness.
- Utilize a Fitting Mate: Enroll the assistance of a companion or relative to take your estimations. Particularly beneficial for difficult-to-reach areas like the back is this.
- Make a Sloper: Foster an essential sloper or block design that fits you impeccably. This fills in as an establishment for making another piece of clothing design.
- Mock-Ups in Muslin: Close muslin or model forms of your Patterns before cutting into your last texture. Without wasting expensive materials, you can test the fit and make adjustments with this.
- Learn Pattern Adjustments: Look into regular Pattern changes, for pattern, adapting to a complete bust, restricted shoulders, or a swayback. Fit can significantly benefit from these adjustments.
Working with Various Textures
These are some points to be noted:

Texture Choice: Pick textures that are suitable for your task. When selecting materials, take drape, weight, and stretch into account.
Fabric Evaluation: Before cutting your Pattern pieces, test your picked texture by sewing a little Pattern piece. This assists you with understanding how the surface acts and how it will associate with your pattern.
Taking care of Stretch Textures: While working with stretch textures, utilize the fitting stretch rate on your Patterns and use a stretch or ballpoint needle on your sewing machine.
Design Coordinating: If your texture has a Pattern or print, focus on design coordinating. Adjust design pieces so the plan streams flawlessly across creases.
Checking Textures: Utilize the designer’s chalk, texture markers, or string following to move design markings precisely to your texture. These markings guide you during sewing.
Things That Matter: Appropriately press your texture pieces when sewing. To achieve professional results, select the proper heat setting for your fabric.
Stay-Stitching: Forestall texture contortion by stay-sewing bent or inclination cut edges. This includes sewing a line of join right inside the crease recompense.
Analyze and Learn: Go ahead with various textures and methods. Experience is the best teacher, as handling different kinds of fabric may necessitate other methods.
See Also: Sewing Projects For Adults: Inspiring Ideas For 2023
Regular Mix-ups to Stay away from
To guarantee a fruitful sewing venture and Pattern-making experience, be aware of these normal slip-ups:
Wrong Estimations
Perhaps one of the primary missteps you can make is taking off-base estimations. Clothing that doesn’t fit right and wastes time and materials can result from inaccurate measurements.

To stay away from this:
- Use a flexible measuring tape at all times.
- Twofold will look at your estimations and have somebody help you if conceivable.
- Follow an estimation manual to guarantee you’re estimating the suitable regions.
- Update your estimations occasionally, as your body can change over the long haul.
Not Testing the Pattern
Neglecting to test your pattern before cutting into your last texture is a slip-up that can be exorbitant regarding time and materials.
Trying your pattern with a model (muslin) is fundamental because of multiple factors:

- It lets you distinguish fit issues and make vital changes without destroying your texture.
- You can check the precision of your Pattern pieces and markings.
- It’s a potential chance to work on sewing methods and gain certainty before chipping away at your last venture.
- You can make design changes before putting them on the finished garment.
See Also: How To Set Up A Sewing Machine: A Step-By-Step Guide
FAQS
How to make your own patterns for sewing?
To make your own sewing patterns, begin by taking precise measurements. Draft your pattern on paper, considering design elements and adding seam allowances. Test it with a mock-up in inexpensive fabric. Adjust as needed. Finally, transfer your finalized pattern to material and enjoy crafting custom-fit garments.
How to make patterns for sewing your own clothes?
Start with accurate body measurements to create sewing patterns for your clothes. Draft your patterns on paper or use pattern-making software. Adjust for style preferences and add seam allowances. Test with a mock-up in muslin before cutting the final fabric. Refine and adjust as needed for a perfect fit.
How to make your own sewing patterns for stuffed animals?
Designing sewing patterns for stuffed animals involves sketching the desired shape and size on paper. Create pattern pieces for each animal part, such as the body, limbs, ears, and tail. Adjust these pieces as needed for proportions. Once satisfied, transfer the patterns to the fabric and sew the pieces together.
How to make your own sewing patterns for stuffed animals from scratch?
Sketch the desired animal's shape and size on paper to make sewing patterns for stuffed animals from scratch. Create separate pattern pieces for each part, adjusting them for size and proportion. Cut these pieces from fabric and sew them together, adding stuffing to give the animal its shape. Customize details like eyes, nose, and clothing as desired.
How to make your own plush sewing patterns?
Designing plush sewing patterns involves sketching the desired toy shape on paper, creating separate pattern pieces for different parts, adjusting for proportions, and transferring these patterns to fabric. Assemble the plush toy by sewing and stuffing the elements, and add any embellishments or features like facial details and clothing.
Name some books on how to make your own sewing patterns.
1. 'Pattern-making for Fashion Design' by Helen Joseph Armstrong 2. 'Design-It-Yourself Clothes: Pattern-making Simplified' by Cal Patch 3. 'Pattern Cutting: The Architecture of Fashion' by Pat Parish 4. 'Make Your Patterns: An Easy Step-by-Step Guide to Making Over 60 Dressmaking Patterns' by Rene Bergh 5. 'Pattern Magic' by Tomoko Nakamichi
Conclusion
In conclusion, “How to make your own sewing patterns” is an easily answerable query. Embarking on making your sewing patterns is a rewarding endeavor for beginners. This comprehensive guide has equipped you with the fundamental knowledge and step-by-step instructions to create custom patterns that fit perfectly and reflect your unique style. From taking precise measurements to mastering the art of adjustments and working with different fabrics, you’ve learned the fundamental techniques. Remember, pattern-making is a skill that improves with practice, so be patient and embrace the creative process. As you delve into the world of sewing, you’ll discover the joy of designing and crafting garments that are indeed your own.

I am Sammy and I blog at Live it. Love it. Make it. It is creative lifestyle blog run by best friends H and Sammy. Head over and follow our crafty adventures!