Discover the answer to the query “How to hem pants without a sewing machine” in our comprehensive DIY guide. Whether it’s your favorite pair of jeans, comfortable yoga pants, or professional suit trousers, this article will walk you through the step-by-step process. From measuring and cutting to securing hems, we’ll provide practical techniques and helpful tips to achieve clean, polished results – all without using a sewing machine.
Hemming pants sans sewing machine is simpler than you think. Start by folding the cuffs, securing them with pins, and using tiny stitches to hand them. Achieve a professional touch by ironing the crease. If hemming isn’t your thing, try fusible tape for a no-hem alternative. With patience, practice, and our step-by-step guide, you’ll transform your pants into custom-fitted perfection. Whether work attire or casual wear, this DIY method guarantees a tailored look without the sewing machine hassle.
Learning how to hem pants without a sewing machine offers independence and resourcefulness. It empowers you to customize your wardrobe, ensuring a perfect fit for any occasion. This skill is valuable, allowing you to salvage pants that are too long or refresh your style without relying on professional services. Moreover, it’s a sustainable choice, reducing the need for excessive consumption. Mastering this technique brings a sense of accomplishment and the ability to create well-finished garments conveniently.
How to hem pants without a sewing machine: What You Will Need
To hem pants without a sewing machine, you’ll require:
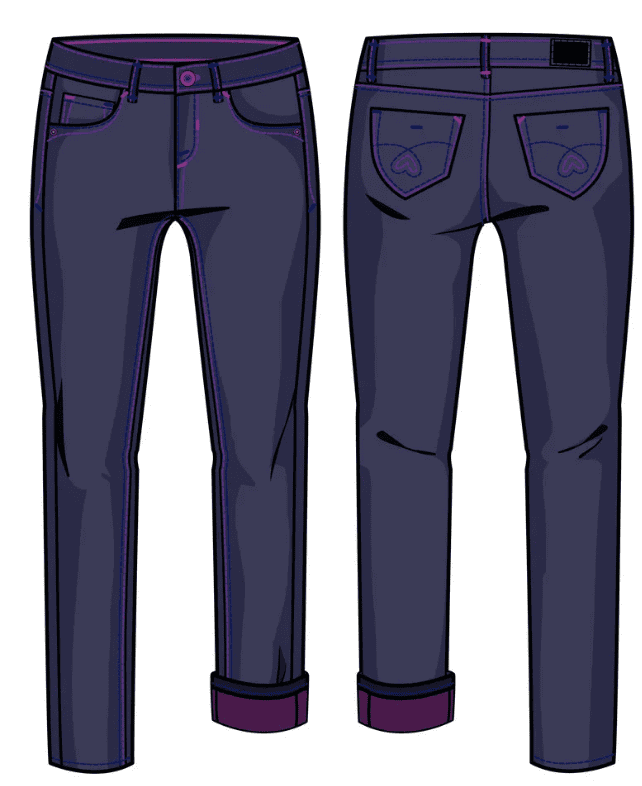
- Pants needing hemming
- Estimating tape
- Texture chalk or launderable marker
- Sharp texture scissors
- Pins or clasp
- Iron and pressing board
- Needle
- A string that matches the jeans
- Thimble (discretionary, for finger assurance)
- Little ruler or straight-edge
These materials permit you to precisely quantify, mark, and secure the hem before hand-hemming it up.
See Also: SEWING TIPS: BIAS BINDING
Setting up Your Jeans for Hemming
Here’s how:
Ripping out old hem
1. Turn the jeans back to the front and cautiously eliminate lines from the current trim using a crease ripper or scissors.
2. Tenderly force the strings to hem the trim, being mindful not to harm the texture.

See also: MAKE IT: FABRIC CARD WALLET.
Getting into the Jeans with Matching Shoes:
1. Wear the jeans and shoes you expect to coordinate them with. Stand normally to guarantee the jeans fall at the ideal length.

2. Have a companion help you or utilize a mirror to measure how much length should be stitched.

Cuffing the Pants at the Correct Length:
1. Remove the jeans and turn them back to the front.
2. Crease up the hem to the ideal length, utilizing the imprints made before with chalk or marker.
3. Use pins or clasps to set up the collapsed texture around the leg equitably.
4. Set the jeans back on to twofold; look at the sleeve length and make changes if necessary.
5. Eliminate the jeans again and iron the collapsed sleeve level to make a fresh wrinkle.
6. Cautiously hand them along the wrinkle, utilizing a straight fasten, to get the sleeve set up.
Following these means will guarantee you have the jeans arranged accurately for hemming, permitting you to accomplish a clean and flawless completion.
See Also: Crochet Patterns For Doll Clothes: Top Designs For 2023
How to hem pants without a sewing machine: Measuring and Cutting the Hem
Here’s how:
Estimating the Cuffs:
1. Lay the jeans on a level surface with the collapsed sleeves looking up.

2. Utilize an estimating tape to quantify the separation from the collapsed edge of the sleeve to the ideal stitch length. Make a point to quantify numerous focuses around the leg to guarantee an even hem.

Pressing the Cuffs:
1. Use an iron to press the collapsed sleeves level before estimating. This will assist you with getting exact estimations and a spotless stitch.

2. Lay a slight material or squeeze fabric over the sleeves to safeguard the texture from direct intensity and forestall sparkle.
Estimating from the Pressed Hemline:
1. To guarantee exactness, measure the ideal length from the pressed wrinkle of the collapsed sleeve, not the crude edge. This records for any varieties brought about by the collapsing system.
2. Mark the estimation with texture chalk or a launderable marker at numerous focuses around the leg to direct your hemming.

Taking exact estimations, pressing the sleeves for a fresh complexion, and estimating from the pressed hemline will add to a professional hemming process.
See also: LOVE IT: CUTTLEBUG DIE CUTTING MACHINE.
Instructions to cut the texture along the chalked line
Here’s what to do:
Cutting the Texture along the Chalked Line:
1. In the wake of estimating and denoting the ideal trim length with chalk, utilize sharp texture scissors to cut along the obvious line cautiously.

2. Take as much time as is needed to guarantee a straight and well-put-together, and be careful not to slice excessively near the chalk line.
Hemming the Pants:
1. String a needle with the string that matches the texture tone.
2. Hitch the string’s finish and hemming from within the jeans to cover the bunch up.
3. Bring the needle up through the collapsed texture of the sleeve and pull it tight, then, at that point, embed it back down a brief distance away to get the fasten.
4. Keep hemming with little, even fastening along the collapsed sleeve. Ensure the join gets the two layers of texture to hold the hem safely.
5. Work your strategy for getting around the leg, keeping the joint steady and the hem even.
Taking a stab at the Jeans and Making Adjustments:
1. When the hem is hem, take a stab at the jeans with the shoes you plan to wear.
2. Look at the length to ensure it’s the ideal fit. Assuming changes are required, mark the new height with chalk while wearing the jeans.
3. Remove the jeans and change the trim in like manner. You could have to eliminate the current lines and hem the frame again at the new length.
4. Take a stab at the jeans again to guarantee the new length is wonderful before completing the hemming system.
Following these means will direct you through cutting the texture, hemming the hemes, and making fundamental changes by accomplishing well-fitted and expertly stitched pants.
Trimming Jeans with Fusible Tape
Follow these:
Binding the Jeans and Ironing:

1. Overlap the jeans’ sleeves to the ideal length and secure them with pins or clasps to keep them set up.
2. Iron the collapsed sleeves to make a fresh wrinkle. Place a squeezing material between the iron and texture to forestall direct-induced harm.
Managing the Abundance Fabric:
1. With the sleeves actually stuck or cut, turn the jeans back to the front.
2. Trim any overabundance of texture past the wrinkle, passing on a little crease remittance to represent the thickness of the texture.
Unfurling Sleeves and Applying Fusible Tape:

1. Cautiously unfurl the sleeves you pressed before.
2. Place fusible trimming tape within the overlap near the wrinkle. Ensure the tape is equitably positioned along the whole length of the sleeve.
Intertwining the Tape with the Fabric:
1. Refold the sleeves along the pressed wrinkle, sandwiching the fusible tape between the layers.
2. Utilize a squeezing material to cover the sleeves, and press a hot iron over the texture. Adhere to the producer’s directions for intensity and length.
Taking a stab at Jeans and Making Adjustments:

1. Put on the jeans alongside the shoes you intend to wear.
2. Look at the length to guarantee it’s as you prefer. Assuming changes are required, mark the new height with chalk while wearing the jeans.
3. Remove the jeans and rehash the moves toward combining the tape at the new length if essential.
Involving fusible tape for hemming offers a no-hem arrangement. However, observe the tape producer’s rules and test them on a piece’s texture before applying it to your jeans.
Tips and Alerts
Try these tips.

Take Your Time:
Trimming requires accuracy, so turn out quietly for a spotless completion.
Practice on Piece Fabric:
Assuming you’re new to hemming, practice on piece texture before dealing with your jeans.
Utilize Quality Tools:
Sharp scissors, dependable string, and proper needles make the cycle more straightforward.
Secure the Cuff:
Use pins or clasps to keep the sleeve set up before hemming.
Measure Twice:
Twofold looks at estimations before slicing or hemming to avoid botches.
Pressing is Key:
Squeezing your sleeves before hemming makes an expert look.
Test Fusible Tape:
When utilizing fusible tape, test it on a piece first to guarantee it fills in true to form.
Admonitions and Things to Avoid

- Cutting Too Short: Continuously cut short of what you assume you want, as managing abundance is more straightforward than adding length.
- Exhausting the Fabric: Inordinate sticking or unfastening can extend or contort the texture.
- Overlooking Texture Type: Textures require various procedures, so change your methodology.
- Skipping Intertwining Steps: When utilizing fusible tape, follow the maker’s directions intently for legitimate melding.
- Rushing:bHemming is thorough work, so surging can prompt lopsided hems.
Following these tips and being careful of the warnings will assist you with accomplishing success while hemming your jeans without a sewing machine.
FAQS
We are presenting you with some FAQS.
How to Hem Pants Without a Sewing Machine?
Fold the cuffs, secure them with pins, and hand them using tiny, even stitches. Press the crease for a polished appearance.
How to Hem Scrub Pants Without a Sewing Machine?
Fold and pin the cuffs, and hand them neatly—iron to achieve a professional finish. Adjust length if needed.
How to Hem Yoga Pants Without a Sewing Machine?
Fold cuffs, secure with pins, hand-hem. Ensure comfort and length, then press for a tidy look.
How to Hem Suit Pants Without a Sewing Machine?
Fold and pin cuffs evenly and hand them carefully. Iron to maintain a sharp, tailored appearance.
How to Hem Pants at Home Without a Sewing Machine?
Fold cuffs, secure with pins, hand-hem. Press for a clean finish that elevates the look.
How to Hem Pants with a Sewing Machine Without Cutting?
Fold cuffs use the sewing machine's blind hem stitch. Adjust settings for an inconspicuous finish that retains the original length.
How to Hem Pants with a Sewing Machine Without Cutting?
Fold cuffs use the sewing machine’s blind hem stitch. Adjust settings for an inconspicuous finish that retains the original length.
Conclusion
In conclusion, the query “How to hem pants without a sewing machine” is quite easy to resolve. Hemming pants without a sewing machine involves carefully folding the cuffs, securing them with pins or clips, and hand-hemming with precision. Pressing the cuffs adds a professional touch to the final look. For those seeking an alternative, fusible tape offers a no-hem option, but testing it on scrap fabric is advised. Hemming your pants is a rewarding skill to acquire. The process may seem intricate, but you can achieve tailored results with patience and practice. Whether it’s scrub pants, yoga pants, or even suit pants, customizing the length to your preference adds a personal touch to your wardrobe. Embrace the challenge and embark on your hemming journey – the satisfaction of a well-finished hem is well worth the effort!

I am Sammy and I blog at Live it. Love it. Make it. It is creative lifestyle blog run by best friends H and Sammy. Head over and follow our crafty adventures!