Ever wondered how you can transform everyday paper waste into beautiful, personalized sheets? This guide dives into the simple yet profound process of making DIY paper. Perfect for craft lovers and environmental enthusiasts alike, learn how you can start your paper-making journey at home with ease.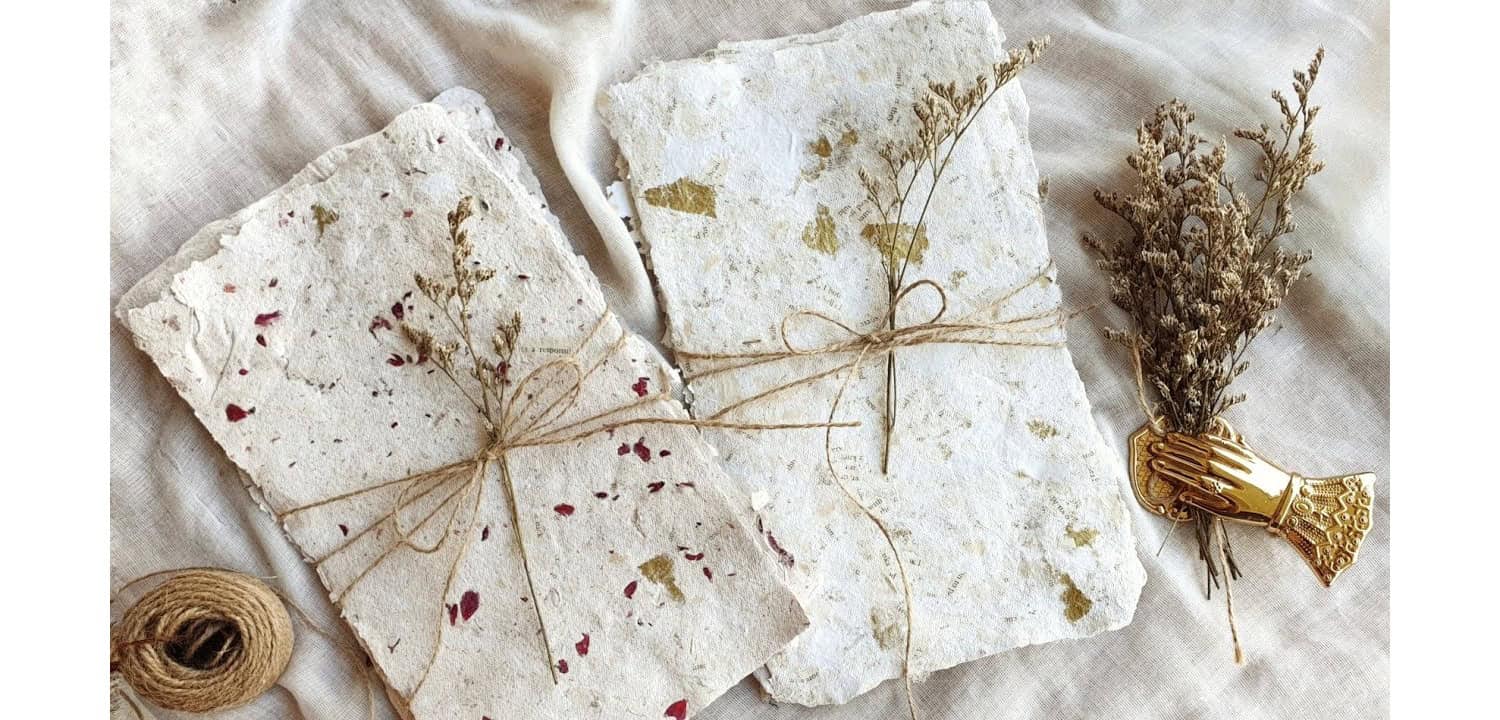
How to Make DIY Paper: Shred scrap paper into small pieces. Soak them in warm water overnight. Blend the mixture into a pulp, spread it evenly on a screen, and press out the water. Let it dry, and voila! Your homemade paper is ready.Keep Reading for More!
Don’t stop now! Discover detailed steps, tips, and creative ideas in the following sections to master the art of DIY paper crafting. Turn your recycled paper into art and make each page tell a story. Keep reading to become a paper-making pro!
Preparing the Materials
Here we have provided you the list of the material needed:
Collecting Paper Scraps
Choosing the Right Paper:
- Select Non-Glossy Paper: Opt for materials like newspapers, office paper, or old notebooks.
- Avoid Glossy Materials: Glossy magazines and colored ads contain inks not suitable for recycling.
Preparation Steps:
- Tear Paper into Small Pieces: Aim for pieces about one square inch to ensure easy processing.
- Storage: Keep the scraps in a dry place until you accumulate enough for a batch.
Creating the Pulp
Initial Preparation:
- Soak the Paper Scraps: Cover them with warm water and let them soak overnight, or for at least 8 hours.
Pulping Process:
- Drain and Blend: After soaking, drain the water and transfer scraps to a blender. Add water to just cover the paper bits.
- Blend to Right Consistency: Blend on a low to medium setting until the mixture becomes a homogenous pulp resembling oatmeal.
Consistency Check:
- Adjust as Needed: If too runny, add more paper; if too thick, add more water.
Forming the Paper Sheet
Setting Up the Equipment:
- Use a Mold and Deckle: This tool helps in shaping and sizing your paper.
- Alternatives: If unavailable, a fine mesh stretched over a frame can work.
Forming the Sheet:
- Spread the Pulp Evenly: Pour the pulp over the mold and spread evenly with a flat utensil.
- Initial Drying: Allow excess water to drain by setting the mold at an angle.
Pro Tips for Even Sheets:
- Even Spreading: Use a sponge to press down gently and absorb excess water.
- Check for Consistency: Ensure the pulp layer is uniform to avoid thin spots in your final paper.
By following these structured steps, you can efficiently prepare your materials for making DIY paper, ensuring a quality end product.
Drying and Finishing
Here in this section, we will talk about how can you dry your paper:
Pressing and Drying the Paper
Effective Water Removal Techniques:
- Use Absorbent Materials: Press the pulp using sponges or felt to absorb excess water without disturbing the fibers.
- Press Gently: Apply gentle, even pressure to ensure uniform thickness and texture.
Setting for Drying:
- Air Drying: Lay the paper out on a flat, absorbent surface in a well-ventilated area.
- Press Under Weight: Place a heavy object on top of the paper, covered with cloth, to ensure it dries flat.
Advanced Techniques:
- Iron for Smoothness: For a smoother finish, place the paper between two cloths and iron on a low heat setting.
- Use a Press: If available, a paper press can uniformly remove water and promote faster drying.
Final Touches and Uses of DIY Paper
Decorating Your Paper:
- Add Natural Elements: During the pulp stage, incorporate leaves or petals for a decorative touch.
- Color It: Use non-toxic dyes or food coloring to add hues before the drying stage.
Crafting with DIY Paper:
- Cut into Shapes: Use your handmade paper for greeting cards, bookmarks, or gift tags.
- Layer for Texture: Layer pieces to create textured effects for art projects.
Creative Uses:
- Personalized Stationery: Create your own themed stationery sets.
- Scrapbooking: Use the paper as a unique background for scrapbook pages.
Troubleshooting Common Problems
Common Issues and Fixes:
- Uneven Texture: Ensure the pulp is spread evenly across the screen. Use a flat tool to smooth out any lumps.
- Paper Breakage: Increase the pulp’s fiber content by adding cotton lint from dryer screens or torn cotton fabric.
Preventative Measures:
- Consistent Thickness: Regularly check for thickness variations while spreading the pulp.
- Proper Drying: Ensure the paper dries uniformly to avoid curling or tearing.
By mastering these finishing techniques and troubleshooting common problems, you can enhance the quality and appearance of your DIY paper, making it suitable for a wide range of crafts and applications.
FAQ Section
What materials do you need to make paper at home?
Gather non-glossy scrap paper, a blender, a basin, a mold and deckle, and absorbent cloths. These tools are essential for DIY paper making.
Can you make paper without a screen?
Yes, you can use a finely woven cloth or mesh instead of a screen. This alternative still allows water to drain while forming the paper pulp into sheets.
How long does it take for handmade paper to dry?
Drying time varies, but typically it takes about 24 hours. Faster drying can be achieved by pressing and using absorbent materials to remove excess water.
Is homemade paper eco-friendly?
Absolutely! Making paper at home recycles waste and reduces the demand for new paper production, supporting sustainability efforts.
Conclusion
Congratulations on learning the essentials of making your own paper at home! Whether you’re crafting with kids or looking for eco-friendly projects, homemade paper offers a wonderful way to recycle and create. Experiment with different textures and additives to make each sheet uniquely yours. Don’t forget to share your paper-making stories and results; we love seeing your creative endeavors!

I am Sammy and I blog at Live it. Love it. Make it. It is creative lifestyle blog run by best friends H and Sammy. Head over and follow our crafty adventures!