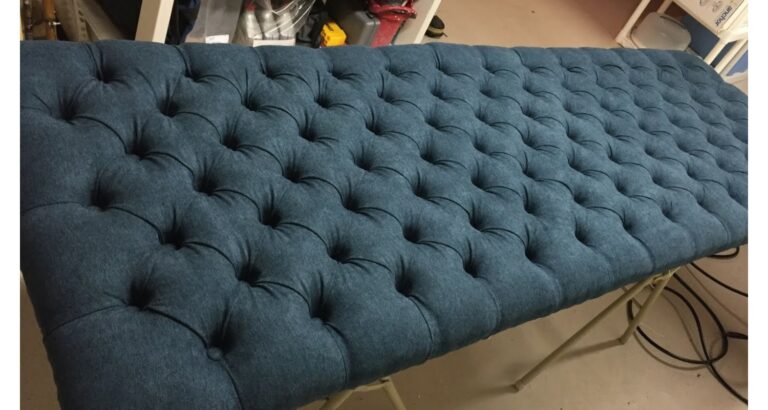
Did you know you can transform ordinary barb wire into stunning art pieces? This article guides you through the simple steps of making barb wire art. Discover how to bend and shape this rugged material into beautiful sculptures that capture the imagination.
How to make barb wire art: Wear gloves for safety. Cut lengths of barb wire. Use pliers to bend and twist the wire into your desired shape. Secure connections with wire or welding. Apply rust-proofing for longevity.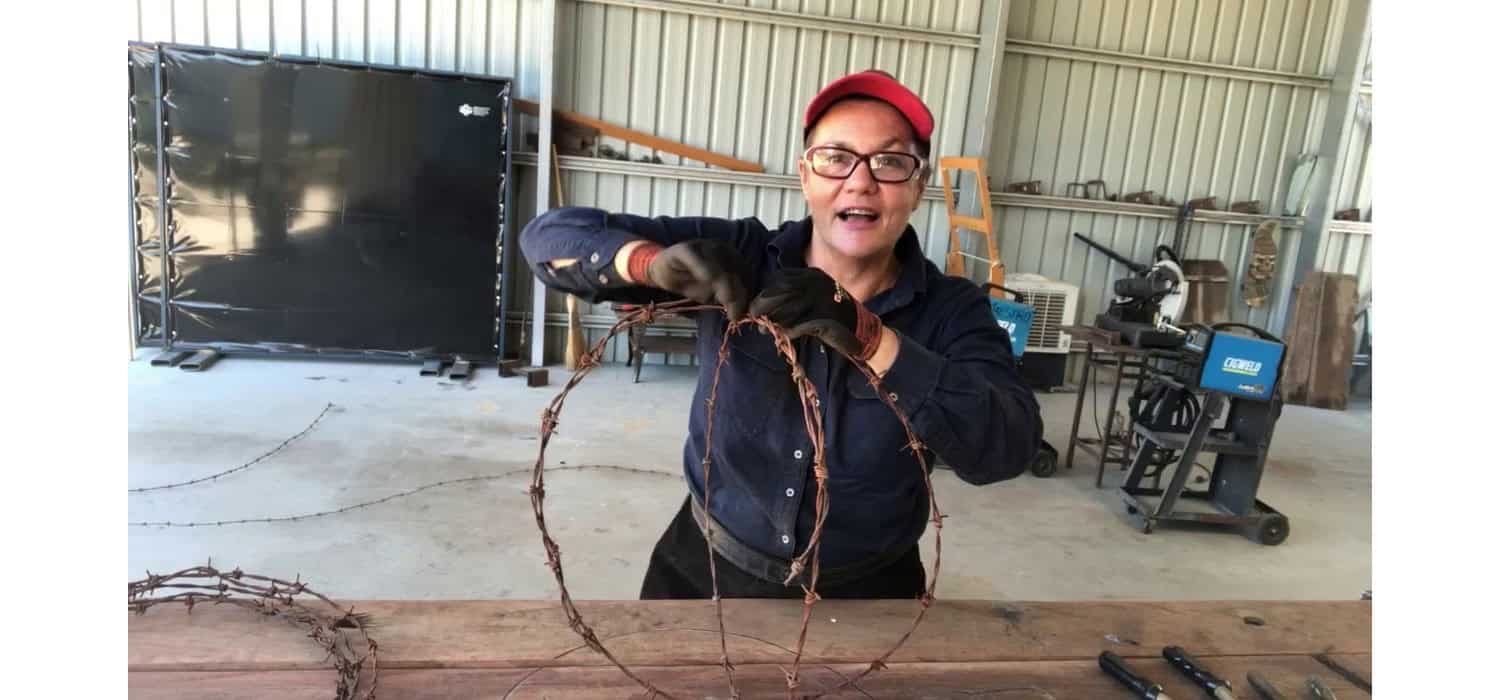
Keep reading to unlock more tips and tricks! Learn how to choose the right materials, master techniques, and ensure your creations last. Turn the ordinary into extraordinary today!
Key Materials Needed
- Barb wire
- Gloves
- Pliers
- Wire cutters
- Safety glasses
Safety Tips
- Always wear gloves when handling barb wire to protect your hands from cuts.
- Safety glasses are a must to shield your eyes from any flying debris while cutting or shaping the wire.
- Handle barb wire with care, ensuring slow and deliberate movements to avoid injuries.
Basic Barb Wire Art Techniques
- Cutting: Begin by choosing the right length of barb wire for your project. Use a tape measure to mark the length accurately. Ensure you’re wearing gloves to protect your hands. Using heavy-duty wire cuters, apply firm pressure to make a clean cut through the barb wire.
- Bending: With the rough cut piece of barb wire, start bending it into the basic shape you desire. Use pliers to help make precise bends, especially in tighter curves or more intricate designs. Work slowly to maintain control and prevent any unintended kinks or sharp bends that could weaken the wire.
- Shaping: After achieving the general shape, use your pliers for finer adjustments. Twist the wire ends or make small tweaks to refine the shape. This step might require some back-and-forth adjustments to get the exact look you want.
Simple Projects to Start With
- Basic Shapes: Creating basic geometric shapes is a good practice for beginners. For a circle, start by bending the wire into a rough loop, then adjust to smooth out the shape. For squares, make sharp bends at every corner using your pliers, checking angles to ensure they are right.
- Letters: Forming letters is a bit more complex and a good next step after mastering basic shapes. Choose a simple font style and begin shaping each letter from the barb wire. Start with vertical or horizontal pieces, and gradually add curves and angles. For example, to make the letter “B,” start with a straight vertical piece for the backbone, then add two bubbled bends for the top and bottom loops.
These introductory projects not only familiarize you with handling and manipulating barb wire but also pave the way for more complex sculptures and designs as you gain confidence and skill.
Crafting a Barb Wire Wreath
Creating a barb wire wreath adds a rustic charm to any decor, and the process is straightforward with the right approach. Here’s how to make your own:
Gathering Materials
- Barb wire: Choose a length based on the size of the wreath you want.
- Gloves: Always wear gloves to protect your hands.
- Pliers and wire cutters: Essential for cutting and shaping the wire.
- Decorative elements: Such as dried flowers, ribbons, or rustic bells.
Forming the Base
- Cut the Wire: Measure and cut a piece of barb wire using wire cutters. For a standard wreath, 5-6 feet should suffice.
- Shape the Circle: Start coiling the wire into a circular shape. Use your hands and pliers to bend the wire gently. Overlap the ends by a few inches to ensure stability.
- Secure the Ends: Use pliers to twist the overlapping ends together tightly. This secures the base of your wreath and prevents it from unraveling.
Refining the Shape
- Adjust the Circle: Go around the circle, adjusting as needed to create a smooth and even shape. The pliers can help make minor adjustments to ensure the circle is as round as possible.
Decorating the Wreath
- Plan Your Design: Decide where you want each decorative element to go. Symmetry is visually pleasing, but an asymmetrical design can add character.
- Attach Decorations: Use thin wire or floral wire to attach each element to the wreath. For heavier items, ensure they are securely fastened to hold their weight without sagging.
- Add Finishing Touches: Step back and review your wreath. Adjust any decorations as needed to achieve the desired look.
Displaying Your Wreath
- Choose a Spot: A door, wall, or window makes a great backdrop for displaying your barb wire wreath.
- Hang Securely: Use a sturdy hook or nail to hang the wreath. Ensure it’s secure to prevent any accidents due to its weight and the nature of barb wire.
Crafting a barb wire wreath can be a rewarding DIY project, adding a unique and personal touch to your home decor.
Making a Barb Wire Star
Crafting a star from barb wire is an engaging project that results in a striking piece of decor. Follow these detailed steps to create your own barb wire star, perfect for rustic or country-style settings.
Materials Needed
- Barb wire: Approximately 10 feet to allow for cutting and adjustments.
- Gloves: Essential to protect your hands from sharp barbs.
- Pliers and wire cutters: For cutting and shaping the wire.
- Tape measure: To accurately calculate the spacing for the star points.
Measuring and Cutting the Wire
- Determine Star Size: Decide how large you want your star to be. A typical size is about 2 feet across.
- Cut Wire: Measure and cut five equal lengths of barb wire using wire cutters, each piece corresponding to one point of the star.
Forming the Star Points
- Shape Each Point: Bend each wire piece into a “V” shape at the midpoint. The angle of the “V” determines the sharpness of each star point—narrower angles create sharper points.
- Calculate Spacing: Lay out the “V” shapes in a star pattern on a flat surface. Adjust the spacing between points so that each “V” touches two others at its ends, forming a perfect star.
Securing the Star
- Join the Points: Use pliers to twist the ends of each “V” where they meet the others. Ensure each connection is tightly secured to maintain the star’s shape.
- Refine the Shape: Go around each joint and tighten any loose connections. Use your pliers to fine-tune the angles and ensure the star is symmetrical.
Finishing Touches
- Check for Stability: Ensure all joints are secure and the star holds its shape well.
- Optional Decorations: You can wrap parts of the star with colorful ribbons or add small lights for a festive touch.
Displaying your barb wire star can add a unique element to your home decor, especially during festive seasons or as a year-round decoration in a themed room or outdoor space.
Advanced Projects and Finishing Touches
Here are the list of Advanced Barb Wire Art Projects:
Complex Projects to Explore
- Barb Wire Cross: Begin by cutting two pieces of barb wire: one longer for the vertical beam and one shorter for the horizontal beam. Attach these at the center using wire or a strong adhesive, ensuring they form a perfect cross. This project can be customized with additional coils or twists around the intersection for a more intricate design.
- Barb Wire Picture Frame: Measure and cut four pieces of barb wire to create a rectangular frame. Twist the ends together at each corner to secure. To enhance the rustic look, wrap thinner barbed wire or decorative twine around the corners. Insert a backing material like burlap for an authentic country-style display.
- Barb Wire Rose: Start with a long piece of barb wire for the stem. Gradually form small loops, twisting the wire back toward the stem to create the rose’s petals. Each loop should be smaller than the last to mimic the natural layering of petals. Secure each petal at the base with a small twist.
Techniques for Adding Decorative Elements
- Combining Materials: Barb wire pairs well with other materials like wood or metal to enhance its visual appeal and functionality. For instance, attaching barb wire to a wooden frame not only strengthens the structure but also adds a textural contrast.
- Decorative Accents: Consider using small metal charms, rustic bells, or even beads to decorate your barb wire creations. These can be attached using fine wire or even strong glue, depending on the project’s requirements.
Techniques for Finishing Touches
You can elevate your barb wire art from simple crafts to stunning, professional-looking pieces that reflect your creativity and skill.
Ensuring Longevity and Aesthetics
- Rust Protection: Apply a clear lacquer or rust-resistant paint to your barb wire art, especially if it will be displayed outdoors. This not only protects the wire but also maintains its appearance over time.
- Smooth Edges: Wherever possible, ensure that the ends of the barb wire are turned inward and secured to avoid sharp edges that could cause injury.
- Harmonizing with Decor: Choose finishing touches that complement the overall decor of where the art will be placed. For example, a barb wire piece intended for a garden setting might incorporate elements like small bird figures or greenery.
By tackling these advanced projects and applying thoughtful finishing touches.
Securing and Finishing Barb Wire Ends
Safety First
- Trimming: Use wire cutters to trim any excess wire ends to avoid sharp points that could cause injury.
- Bending: After trimming, use pliers to bend the wire ends inward, creating a smooth finish that won’t snag or scratch.
Rust Prevention
- Coating: Apply a rust-resistant sealant or paint to the entire surface of the barb wire art to protect it from corrosion, especially if it will be displayed outdoors.
Mounting and Displaying Barb Wire Art
Indoor Settings
- Wall Mounting: Securely attach the barb wire art to a wall using hooks or mounting brackets. Ensure the mounting hardware is suitable for the weight and size of the piece.
- Tabletop Display: For smaller pieces, consider displaying them on tabletops or shelves using stands or easels. Ensure the surface is stable and won’t tip over.
Outdoor Settings
- Garden Display: Secure barb wire art to fences, trellises, or garden stakes using zip ties or sturdy wire. Ensure it is firmly anchored to withstand wind and weather.
- Suspended Installation: Hang larger pieces from sturdy tree branches or pergolas using heavy-duty wire or chains. Check regularly for signs of wear and ensure the installation is secure.
General Tips
- Weather Resistance: Choose materials and mounting methods that can withstand outdoor elements, such as stainless steel hardware and weather-resistant coatings.
- Visibility: Position the barb wire art where it can be easily seen and appreciated, avoiding areas where it may blend into the background or be obscured by foliage.
By taking the necessary precautions to secure and finish barb wire ends, as well as carefully considering the mounting and display options, you can ensure your artwork is not only visually stunning but also safe and durable for years to come.
FAQ’s
1. How do you make a barbed wire ball?
To make a barbed wire ball, start with a core material like foam or a small ball. Wrap the barb wire tightly around it, securing the ends. Use pliers to shape and adjust the wire as needed. Experiment with different sizes for unique decorations.
2. Can you weld barbed wire?
Yes, you can weld barb wire using a welding machine and appropriate safety gear. Welding allows you to join pieces of barb wire together securely, creating larger structures or sculptures.
3. What is the best way to bend barbed wire?
The best way to bend barb wire is to use pliers with a strong grip. Start by making small bends at the desired points, then gradually increase pressure to achieve sharper angles. Take your time and work slowly to avoid damaging the wire.
4. How do you straighten barbed wire?
To straighten barb wire, lay it flat on a hard surface and gently apply pressure along the curved sections using your hands or pliers. Work slowly and methodically, smoothing out any kinks or bends until the wire is straightened.
5. Can you make jewelry from barbed wire?
Yes, you can make jewelry from barbed wire by carefully shaping and bending it into desired designs. Use pliers to create loops, twists, and other decorative elements. Ensure all ends are securely tucked in to prevent snagging.
Conclusion
Creating art with barb wire is a rewarding endeavor that allows for endless creativity. From simple shapes to intricate sculptures, the possibilities are vast. Remember to prioritize safety, experiment with different techniques, and have fun exploring this unique medium. Share your barb wire art experiences with us!

I am Sammy and I blog at Live it. Love it. Make it. It is creative lifestyle blog run by best friends H and Sammy. Head over and follow our crafty adventures!