Are you tired of store-bought lotions filled with chemicals and unknown ingredients? Discover the secrets to creating your own DIY lotion from the comfort of your home. In this article, we’ll unveil simple yet effective methods to make luxurious lotions that nourish your skin naturally.
Answer to “how to make DIY lotion”: To make DIY lotion, combine natural ingredients like shea butter, coconut oil, and essential oils. Melt the ingredients together, then let the mixture cool before whipping it into a smooth consistency. Pour into containers and enjoy your homemade lotion!
Ready to revolutionize your skincare routine? Dive deeper into our step-by-step guide to crafting personalized lotion recipes that cater to your skin’s unique needs. Say goodbye to harsh chemicals and hello to radiant, healthy skin. Keep reading to unlock the secrets of DIY skincare mastery.
Understanding the Basics of Lotion Making
Making lotion at home doesn’t require a fancy lab; simple tools from your kitchen will do. You’ll need a double boiler or a makeshift one with pots, measuring cups, and spoons, as well as a reliable thermometer. Don’t forget containers for storing your homemade creations.
Hygiene and Precision
Hygiene is paramount when concocting lotions. Follow the guidance of esteemed DIY skincare expert Humblebee & Me: sterilize all tools and containers to avoid contamination. Additionally, precise measurements ensure consistency and efficacy. A slight deviation could alter the lotion’s texture or potency, so measure meticulously.
Ingredients and Their Roles
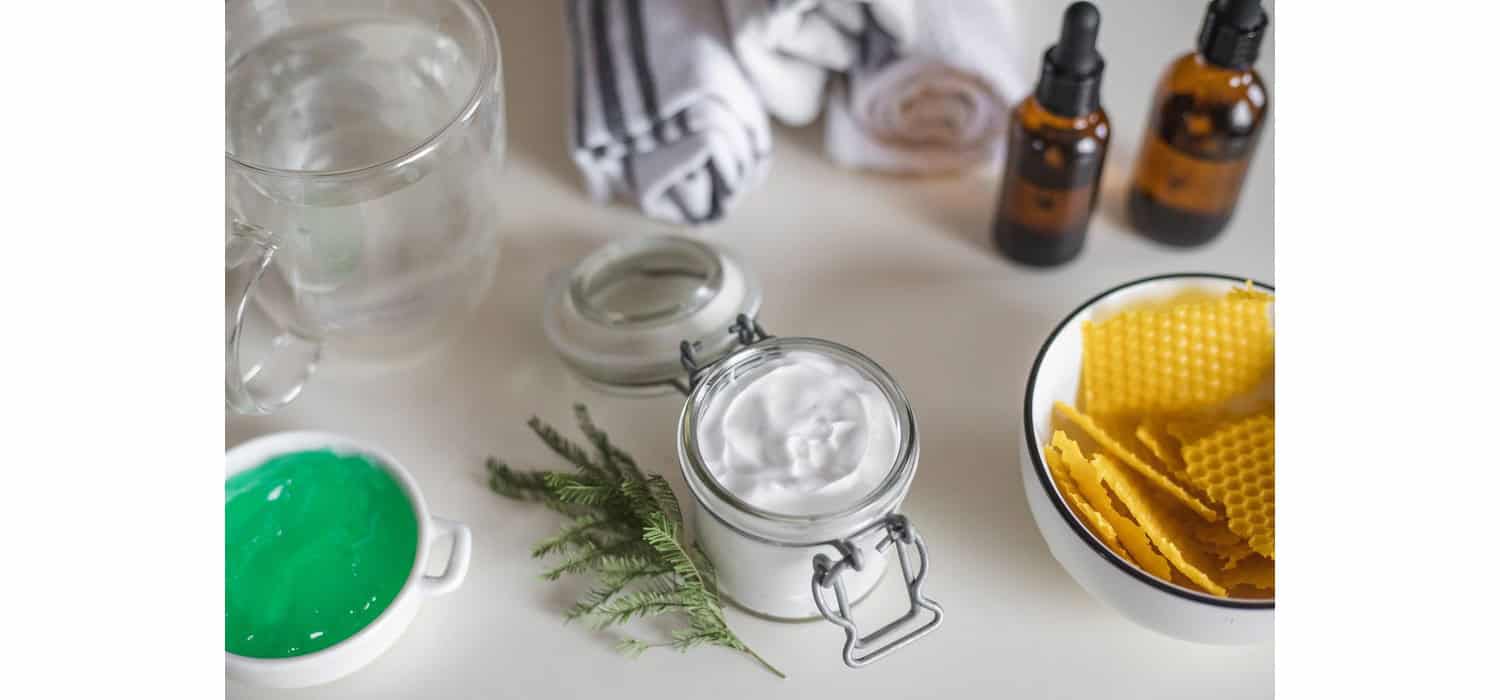
- Shea Butter: Known for its rich moisturizing properties, shea butter is extracted from the nuts of the shea tree. It’s packed with vitamins and fatty acids, making it an excellent choice for soothing dry skin and promoting elasticity.
- Beeswax: Beeswax acts as a natural emollient, forming a protective barrier on the skin while locking in moisture. It’s also prized for its anti-inflammatory and antibacterial properties, making it suitable for sensitive skin types.
- Carrier Oils: Carrier oils like jojoba, almond, and coconut oil serve as the base of many lotion recipes. These oils are lightweight and easily absorbed, delivering essential nutrients to the skin without clogging pores. Each oil offers unique benefits, from hydrating and softening to soothing and rejuvenating.
Understanding Formulation Dynamics:
- Water: Water serves as the primary hydrating agent in lotions, helping to replenish the skin’s moisture levels. It acts as a solvent for other ingredients and provides a lightweight, non-greasy texture.
- Oils: Oils play a crucial role in nourishing and conditioning the skin. They penetrate deep into the skin’s layers, delivering vitamins, antioxidants, and fatty acids for long-lasting hydration and protection.
- Emulsifiers: Emulsifiers are essential for creating stable, uniform lotions by binding water and oil-based ingredients together. Common emulsifiers include beeswax, lecithin, and vegetable glycerin. They ensure that the lotion maintains its consistency and doesn’t separate over time, resulting in a smooth, creamy texture that glides effortlessly onto the skin.
Step-by-Step Guide to Making DIY Lotion
Here is a Step-by-Step Guide to Make DIY Lotion:
Gather Your Ingredients:
- Refer to your chosen recipe from reputable sources like MindBodyGreen and Wild for Nature. Ensure you have all the necessary ingredients, including oils, emulsifiers, water, and optional additives like essential oils for fragrance.
Prepare Your Workspace
- Clean and sanitize your tools and containers to maintain hygiene, following the advice from Garden Therapy. This helps prevent contamination and ensures the longevity of your homemade lotion.
Combine Oils and Butters
- In a double boiler or makeshift one, melt together your oils, butters, and beeswax until fully liquefied. Stir gently to ensure even heating and avoid scorching the ingredients.
Heat Water Phase
- In a separate pot, heat your water phase (distilled water or floral hydrosols) until it reaches a similar temperature to the oil phase. This step helps prevent the emulsion from separating later on.
Emulsify
- Slowly pour the water phase into the oil phase while stirring continuously. Use a hand blender or whisk to emulsify the mixture thoroughly. This process may take several minutes, but it’s crucial for achieving a stable emulsion.
Cool and Additives
- Allow the mixture to cool slightly before adding any heat-sensitive additives like essential oils or preservatives. Stir gently to incorporate these ingredients evenly without disrupting the emulsion.
Check Consistency
- Test the consistency of your lotion by dipping a spoon into the mixture and observing how it coats the back of the spoon. Adjust the thickness by adding more water or oil if necessary, following guidance from Garden Therapy.
Transfer and Store
- Once you’ve achieved the desired consistency, carefully pour the lotion into clean, sterilized containers. Seal tightly to prevent air and moisture from entering, then label with the date and ingredients used.
Final Touches
- Clean up any spills or drips, and wipe down the containers to remove any excess lotion. Store your homemade creations in a cool, dark place away from direct sunlight to preserve their freshness and potency.
Following these meticulous steps will ensure you create luxurious, effective lotions that pamper your skin while avoiding common pitfalls in DIY skincare.
Special Lotion Types and Customizations
Here is the list of various special types of lotions:
Fragrance-Free and Vegan Options:
- Fragrance-Free Lotion: Opt for unscented carrier oils like jojoba or grapeseed oil to avoid any potential irritation from fragrance additives. MindBodyGreen advises using natural emulsifiers such as soy lecithin or vegetable glycerin instead of beeswax to maintain a vegan-friendly formulation.
- Vegan Lotion: Replace animal-derived ingredients like beeswax with plant-based alternatives like candelilla wax or carnauba wax. Ensure all ingredients, including emulsifiers and preservatives, are certified vegan to uphold ethical standards in your skincare routine.
Customized Fragrance and Benefits:
- Essential Oil Blends: Experiment with a variety of essential oils to create custom fragrance blends that cater to your mood and preferences. One Little Project suggests combining lavender and chamomile for a soothing bedtime lotion, or citrus oils like lemon and orange for an invigorating morning boost.
- Therapeutic Additives: Enhance your lotion with additional beneficial additives such as vitamin E oil for its antioxidant properties or aloe vera gel for soothing hydration. Consider incorporating colloidal oatmeal to calm irritated skin or silk amino acids for a silky-smooth texture.
- Hydrating Boosts: Amp up the moisturizing power of your lotion by including hydrating ingredients like glycerin or hyaluronic acid. These humectants attract moisture to the skin, leaving it plump and supple without feeling greasy.
- Skin-Specific Formulations: Tailor your lotion to address specific skin concerns by including targeted ingredients. For acne-prone skin, incorporate tea tree oil or witch hazel for their antibacterial properties. For mature skin, opt for anti-aging ingredients like retinol or peptides to promote collagen production and reduce fine lines and wrinkles.
Sensitive Skin Solutions:
- Hypoallergenic Options: Choose hypoallergenic ingredients such as oat extract or calendula oil to soothe and protect sensitive skin. Avoid common irritants like fragrances, dyes, and harsh preservatives to minimize the risk of allergic reactions.
- Non-Comedogenic Formulations: If you have oily or acne-prone skin, select non-comedogenic oils like argan oil or squalane that won’t clog pores or exacerbate breakouts. Look for lightweight, fast-absorbing textures that won’t leave a greasy residue behind.
With these diverse options for customization, you can create a lotion that caters to your unique preferences and skincare needs, whether you’re seeking fragrance-free simplicity, vegan-friendly formulations, or specialized solutions for sensitive skin.
FAQ Section
What are the benefits of making DIY lotion?
Crafting your DIY lotion allows you to control ingredients, avoiding harmful chemicals found in commercial products. You can tailor formulations to suit your skin's unique needs, ensuring natural nourishment and hydration.
How long does homemade lotion last?
Homemade lotions typically last for 6-12 months when stored properly in a cool, dark place. Adding natural preservatives like vitamin E oil can extend shelf life. Be mindful of any changes in color, scent, or texture, indicating spoilage.
Can I customize DIY lotion for specific skin types?
Absolutely! DIY lotions can be customized with oils and additives tailored to your skin type. For oily skin, opt for lightweight oils like jojoba or grapeseed. Dry skin benefits from richer oils like avocado or shea butter for intense hydration.
Are there any safety considerations when making DIY lotion?
Safety first! Ensure proper hygiene by sterilizing tools and containers. Use a reliable thermometer to monitor temperatures and prevent overheating. Patch test new formulations to check for allergies or sensitivities before full-body application.
Can I add essential oils to my DIY lotion?
Yes, essential oils not only add fragrance but also offer various skin benefits. Choose essential oils like lavender for calming effects or tea tree oil for its antibacterial properties. Remember to dilute properly and adhere to recommended usage rates.
Conclusion
In conclusion, creating your own DIY lotion empowers you to prioritize natural ingredients and customize formulations to your skin’s needs. Embrace experimentation and enjoy the process of crafting personalized skincare solutions. Share your experiences and discoveries with us as you embark on your DIY skincare journey.

I am Sammy and I blog at Live it. Love it. Make it. It is creative lifestyle blog run by best friends H and Sammy. Head over and follow our crafty adventures!


