Are you ready to unleash your creativity and soar to new heights? Dive into the world of DIY kites, where imagination meets the sky! This article will guide you through the simple steps to create your very own kite, ensuring endless fun and a sense of accomplishment. Let’s embark on this high-flying adventure together! To make a DIY kite, gather a sheet of paper, two sticks, string, scissors, and tape. Cross the sticks into a “t” shape, attach to the paper, tie the string to the intersection, and secure with tape. Voilà, your kite is ready to fly!
Key Takeaways for “How to Make a DIY Kite”
- Creativity Unleashed: Designing your own kite allows for endless possibilities in shapes, colors, and patterns.
- Understanding Aerodynamics: Learn how the shape and structure of a kite affect its flight.
- Handcrafting Skills: Develop fine motor skills and attention to detail through cutting, tying, and assembling.
- Outdoor Fun: Kite flying is a perfect way to spend time outdoors, enjoying fresh air and physical activity.
- Family Bonding: Making and flying kites can be a wonderful family activity, creating lasting memories.
In the next sections, we’ll dive into the needed materials and step-by-step instructions for how to make a diy kite.
Essential Materials and Tools for Your DIY Kite
Before diving into kite making, gather the following materials and tools:
Materials
- Lightweight and strong material for the kite body (e.g., plastic sheet, fabric, or paper)
- Two strong, lightweight sticks (e.g., bamboo or wooden dowels)
- String or twine for the frame and flying line
- Tape (e.g., duct tape or electrical tape)
- Scissors
- Ruler
- Markers, paints, or other decorative materials
Tools
- Cutting mat (optional but recommended)
- Craft knife or scissors
- Hot glue gun or craft glue (if using fabric or paper)
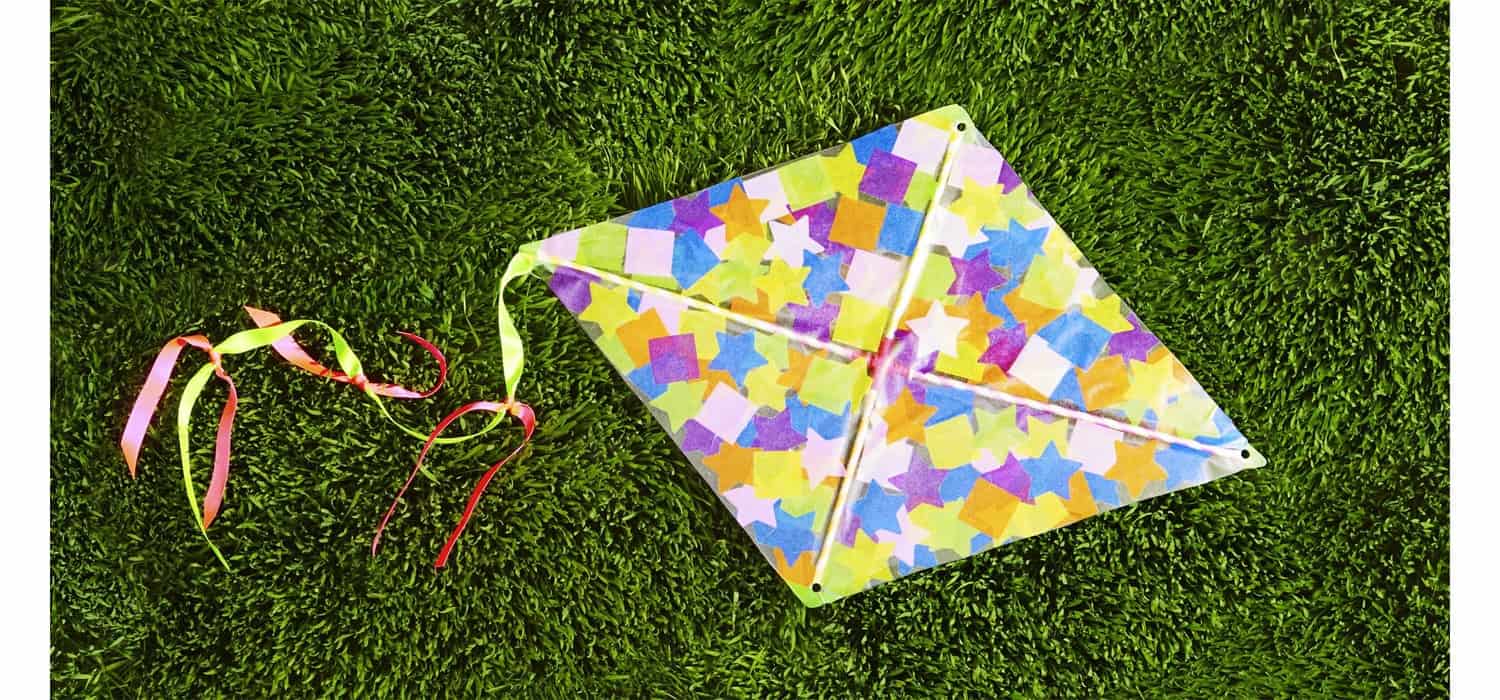
Step-by-Step Guide to Making a Simple Delta Kite
Follow these steps for “How to make a DIY kite”:
Prepare the Frame:
- Lay out your sticks in a delta shape (two shorter sticks for the sides and one longer stick for the spine).
- Use tape to secure the sticks together at the corners, forming the frame of the kite.
Attach the Sail:
- Lay your material flat and place the frame on top.
- Cut the material around the frame, leaving a border of about 2 inches.
- Use tape or glue to attach the material to the frame, ensuring it is taut and smooth.
Add Reinforcements:
- Use tape to reinforce the corners and edges of the kite for added durability.
Add Tail (Optional):
- Attach a tail to the bottom of the kite for stability in flight. Use lightweight material like ribbon or plastic strips.
Attach Flying Line:
- Tie one end of your string to the bottom of the spine.
- Extend the string to your desired length and tie the other end to a spool or handle for flying.
Decorate Your Kite:
- Use markers, paints, or other decorative materials to personalize your kite.
Your simple delta kite is now ready to fly! Remember to choose an open area with steady wind for the best flying experience.
Tips for Successful Kite Flying
- Choose a day with moderate and consistent wind for optimal flying conditions.
- Avoid flying near power lines, trees, or other obstacles that could snag your kite.
- Use a smooth, steady motion to launch your kite into the air.
- Keep a firm grip on the flying line to control the kite’s direction and altitude.
- Have fun and experiment with different flying techniques to see what works best for your kite.
Advanced Kite Designs and Decoration Ideas
Kite making is an art that offers endless possibilities for creativity and innovation. For those looking to take their kite making skills to the next level, advanced designs and decoration ideas can elevate your kite flying experience. Here are some advanced kite designs and decoration ideas to inspire you:
Making a Box Kite: For the Ambitious Kite Maker
For those looking for a challenge, making a box kite is a rewarding project that results in a unique and impressive flying machine. Here’s how you can make one:
Gather Materials
- Lightweight and strong material for the kite body (e.g., fabric or plastic)
- Four lightweight sticks for the frame
- String or twine
- Tape or glue
- Scissors
- Ruler
Build the Frame
- Construct a rectangular frame using the four sticks, ensuring they are evenly spaced and secured at the corners.
Prepare the Sail
- Cut the material to fit around the frame, leaving a border for attaching to the frame.
- Attach the material to the frame using tape or glue, ensuring it is taut and smooth.
Add Cross-Bracing
- To add stability to the kite, attach additional sticks diagonally across the center of the frame, forming an “X” shape.
Attach Flying Line
- Tie the flying line to the center of the kite’s bracing, ensuring it is secure.
Decorate Your Kite
- Personalize your box kite with colors, patterns, and designs to make it stand out in the sky.
Test and Adjust
- Before flying, test your kite in a safe area to ensure it flies properly.
- Make any necessary adjustments to the bracing or flying line for optimal performance.
Decorative Kites: Adding Personal Touch to Your Kite
Adding decorative elements to your kite not only enhances its appearance but also adds personality and flair. Here are some ideas to consider:
- Use colorful ribbons or streamers to create a tail that dances in the wind.
- Paint or draw designs on the sail of your kite, such as geometric patterns, animals, or landscapes.
- Attach small, lightweight objects like beads or bells to the tail for added visual and auditory appeal.
- Experiment with different materials for the sail, such as translucent paper or fabric, to create unique visual effects when flying.
Adding these decorative touches can make your kite a true work of art that stands out in the sky.
Conclusion
In conclusion, kite making is a delightful blend of creativity, craftsmanship, and outdoor adventure. Whether you’re crafting a simple delta kite or tackling the challenge of a box kite, the process offers a rewarding experience and a unique creation to fly high in the sky. Adding personal touches and decorative elements to your kite not only enhances its appearance but also adds a sense of ownership and pride. So, gather your materials, unleash your imagination, and let your kite soar into the blue yonder, carrying with it your dreams and aspirations. Happy flying!
FAQ’s
How do you make a simple kite for kids?
To make a simple kite for kids, use lightweight materials like paper or plastic, two sticks for the frame, and string. Follow a basic diamond or delta shape and decorate it with colors and patterns to make it attractive.
What materials do I need to make a kite?
You'll need lightweight material for the kite body, such as paper, plastic, or fabric, sticks for the frame, string for the flying line, tape or glue, scissors, and decorations like markers or paint.
Can I make a kite without sticks?
Yes, you can make a kite without sticks by using a simple diamond or delta shape made from lightweight material like plastic or fabric. You can also use alternative materials like bamboo skewers or even straws for the frame.
How do you make a kite fly higher?
To make a kite fly higher, ensure it has a lightweight and aerodynamic design, use a longer and stronger flying line, and fly it in an area with steady wind. Adding a tail or adjusting the angle of the kite can also help.
What is the best shape for a kite?
The best shape for a kite depends on the flying conditions and personal preference. Delta and diamond shapes are popular for their stability and simplicity, while box kites offer more complex designs and better performance in strong winds.

I am Sammy and I blog at Live it. Love it. Make it. It is creative lifestyle blog run by best friends H and Sammy. Head over and follow our crafty adventures!