Are you tired of your low table? In this article, we’ll show you a simple DIY method to make your table taller. Plus, we’ll share some cool tips and tricks to enhance your home decor. Don’t miss out!
How to Make a Table Taller DIY: To make a table taller, attach risers or extenders to the legs. You can use wood blocks, metal clamps, or adjustable furniture risers. Measure carefully and secure them tightly for stability.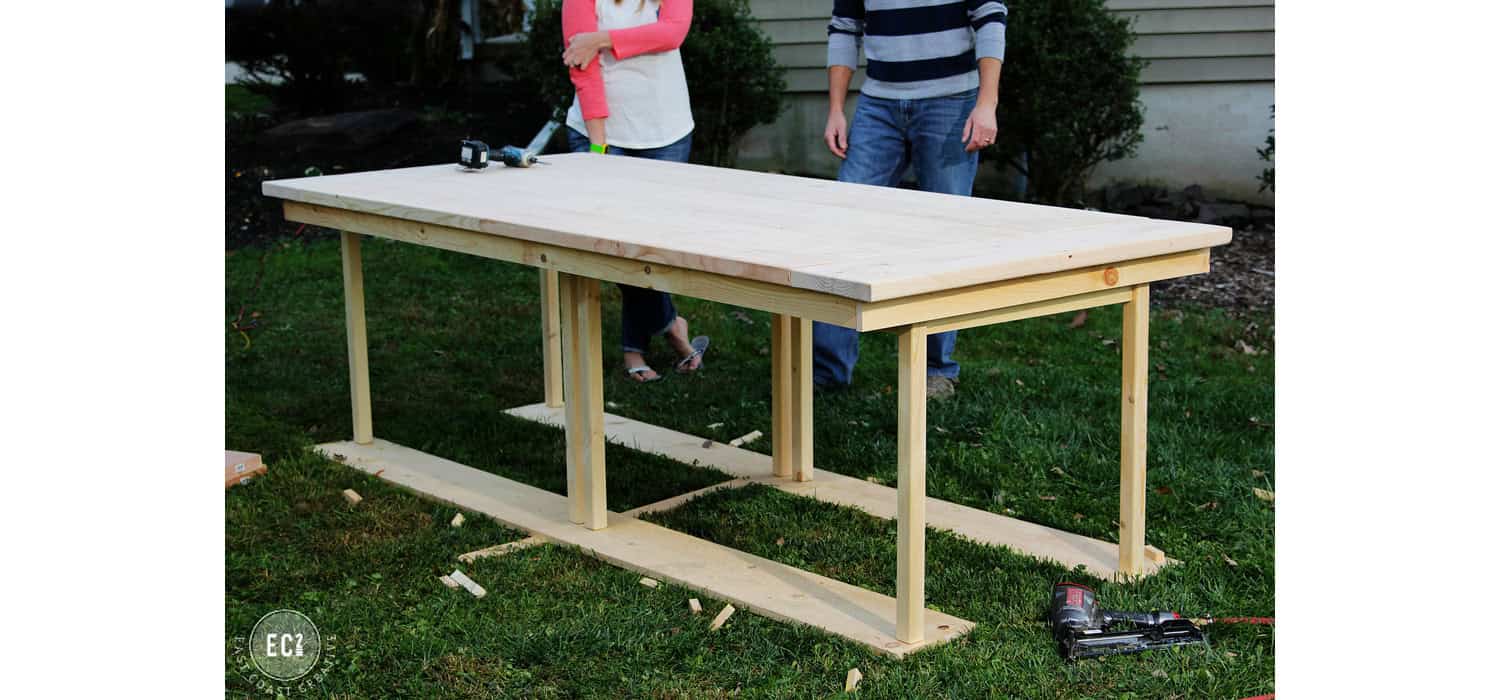
Stay with us for more amazing DIY hacks and home improvement ideas that will transform your space effortlessly. Your dream home is just a few tips away!
Techniques to Make a Table Taller
Making a table taller can be achieved using various techniques depending on the materials and structure of the table. Here are some common methods:
Adding Bun Feet or Furniture Risers
Adding bun feet or furniture risers is a popular method to increase the height of a table while also adding a decorative touch. Here’s how you can go about it:
Steps for Adding Bun Feet:
- Choose the Right Bun Feet: Select bun feet that match your table’s style and desired height increase. They come in various shapes and sizes.
- Measure and Mark: Measure the bottom of your table legs and mark the center point where you’ll attach the bun feet.
- Drill Pilot Holes: Using a drill, create pilot holes at the marked spots on your table legs. This will make it easier to screw in the bun feet.
- Attach Bun Feet: Screw the bun feet into the pilot holes. Ensure they are tightly secured to prevent wobbling.
- Check Stability: Place your table upright and check for stability. Make any necessary adjustments to ensure the table is level.
Steps for Using Furniture Risers:
- Select Suitable Risers: Choose furniture risers that fit the size of your table legs and provide the desired height increase. Consider risers with non-slip surfaces for added stability.
- Position Risers: Place a furniture riser under each leg of your table. Ensure that the risers are centered and the table legs are fully seated in the risers.
- Test Stability: Gently push on the table to check for stability. If the table wobbles, adjust the position of the risers or consider using a different size or style of riser.
- Enjoy Your Elevated Table: Once you’re satisfied with the stability and height, your table is ready to use!
Using PVC Pipes for Metal Tables
- Measure Table Legs: Determine the diameter and height of your metal table legs. This will help you select the right size PVC pipes.
- Purchase PVC Pipes: Buy PVC pipes with an inner diameter slightly larger than the outer diameter of your table legs. Ensure the pipes are long enough to provide the desired height increase.
- Cut PVC Pipes: Using a saw, cut the PVC pipes to the required length. Make sure the cuts are straight for a stable fit.
- Clean and Prepare Pipes: Remove any burrs or rough edges from the cut ends of the PVC pipes. Clean the pipes to remove dust or debris.
- Attach PVC Pipes to Table Legs: Carefully slide the PVC pipes over the metal legs of your table. If the fit is too loose, you can wrap some adhesive tape around the table legs before inserting them into the PVC pipes for a snug fit.
- Check Stability: Once all the PVC pipes are in place, set the table upright and check for stability. Adjust as necessary to ensure the table is level and secure.
- Optional – Secure Pipes: If desired, you can secure the PVC pipes to the table legs with screws or adhesive for added stability. However, this may make it more difficult to remove the pipes later.
By following these steps, you can easily and affordably raise the height of your metal table using PVC pipes.
Installing New, Longer Legs
- Choose New Legs: Select new table legs that match your desired height and style. Make sure they are compatible with your table’s design and material.
- Remove Old Legs: Carefully unscrew or detach the existing legs from your table. Keep any screws or hardware if you’ll need them for the new legs.
- Prepare New Legs: If your new legs come with pre-drilled holes, align them with the attachment points on your table. If not, you may need to drill holes in the new legs to match your table’s mounting pattern.
- Attach New Legs: Secure the new legs to your table using screws or the appropriate hardware. Make sure they are tightly fastened to prevent wobbling.
- Check Stability: Place your table upright and check for stability. Make any necessary adjustments to ensure the table is level and secure.
- Finish: If needed, apply any finishing touches to the new legs, such as paint or stain, to match your table’s appearance.
By installing new, longer legs, you can significantly change the height and look of your table, giving it a fresh, updated feel.
Implementing Adjustable Levelers
- Choose Adjustable Levelers: Select levelers that can support the weight of your table and provide the desired height adjustment. Ensure they have a compatible thread size for your table legs.
- Remove Old Feet: If your table has existing feet or caps on the legs, remove them to make room for the levelers.
- Drill Holes for Levelers: If your table legs don’t already have holes for levelers, drill holes at the bottom of each leg. The hole size should match the thread size of your levelers.
- Insert Levelers: Screw the adjustable levelers into the holes at the bottom of each table leg. Make sure they are securely fastened.
- Adjust Height: Place your table in its desired location and adjust the levelers to achieve the perfect height. Turn the levelers clockwise to raise the table and counterclockwise to lower it.
- Check Stability: Ensure that your table is stable and level by making minor adjustments to the levelers as needed.
- Lock Levelers: Some adjustable levelers come with a locking feature. Once you’ve achieved the desired height, lock the levelers in place to prevent accidental adjustments.
By implementing adjustable levelers, you gain the flexibility to easily adjust the height of your table to suit different needs or to compensate for uneven floors.
Crafting Wooden Extensions
- Measure Table Legs: Determine the length and width of your table legs to ensure your wooden extensions will fit snugly.
- Choose Wood: Select a type of wood that matches your table or can be finished to match. Make sure it’s sturdy enough to support the table’s weight.
- Cut Wood: Cut the wood to the desired length for your extensions. Ensure the cuts are straight and even for stability.
- Drill Holes: If needed, drill holes into the wooden extensions to align with the attachment points on your table legs.
- Attach Extensions: Secure the wooden extensions to your table legs using screws or bolts. Make sure they are tightly fastened.
- Finish: Sand any rough edges and finish the extensions with paint or stain to match your table.
- Check Stability: Ensure the table is stable and level after adding the extensions.
Desk Converters
- Choose a Desk Converter: Select a desk converter that fits your table size and height requirements.
- Position Converter: Place the desk converter on top of your table. Make sure it’s centered and stable.
- Adjust Height: Use the desk converter’s adjustment mechanism to raise your workspace to the desired height.
- Secure Converter: If the desk converter has clamps or locking mechanisms, secure it to your table to prevent shifting.
- Organize Workspace: Arrange your work materials on the desk converter for easy access.
Adjustable Office Chairs
- Select an Adjustable Chair: Choose an office chair with height adjustment capabilities to complement your table’s height.
- Adjust Seat Height: Use the chair’s lever or adjustment mechanism to raise or lower the seat until your feet are flat on the floor and your thighs are parallel to the ground.
- Check Desk Alignment: Ensure that your arms are at a comfortable angle when using your keyboard or writing on the table.
- Adjust Backrest: Position the backrest to support the natural curve of your spine.
- Test Comfort: Sit in the chair and make any final adjustments to ensure comfort and proper posture throughout your workday.
Modifying the Tabletop
- Choose a New Top: Select a new tabletop that meets your desired size, material, and style. Ensure it’s compatible with your existing table base.
- Remove Old Top: Carefully detach the old tabletop from the base. Save any screws or hardware for attaching the new top.
- Prepare New Top: If the new tabletop doesn’t have pre-drilled holes, measure and mark where the screws will go to align with the base.
- Attach New Top: Secure the new tabletop to the base using screws or bolts.
- Finish: Apply any necessary finishes to the new top, such as sealant, paint, or stain, to protect it and enhance its appearance.
- Check Stability: Ensure the table is stable and the top is securely attached to the base.
By modifying the tabletop, you can change the height, look, and functionality of your table, giving it a completely new feel.
Practical DIY Tips and Ideas
Here are some practical DIY tips and ideas that you can try out:
Repurposing Items for Table Height Adjustment
- Books or Wood Blocks: Stack sturdy books or wood blocks under table legs for a quick height boost.
- Pipe Insulation: Use pipe insulation or foam noodles to wrap around metal table legs, then slide PVC pipes over them for a snug fit.
Build Your Own Table Legs
- DIY Wooden Legs: Cut 4×4 lumber to your desired length for rustic, sturdy table legs. Sand and finish them to match your table.
- Metal Pipe Legs: Create industrial-style legs using metal pipes and fittings. Assemble them to your preferred height and attach them to the tabletop.
Consider the Table’s Stability and Style
- Stability: Ensure any modifications you make don’t compromise the table’s stability. Use levelers or adjust the length of legs if needed.
- Style: Choose materials and designs that complement your table’s existing style. Whether it’s modern, rustic, or industrial, maintain a cohesive look.
By implementing these practical DIY tips and ideas, you can easily adjust the height of your table while adding a personal touch to your space.
Conclusion
In conclusion, making your table taller is a simple and effective way to enhance your comfort and the functionality of your space. Whether you choose to add furniture risers, craft wooden extensions, or modify the tabletop, there are plenty of DIY solutions to fit your needs. Don’t forget to prioritize stability and style in your modifications. Share your experiences and tips in the comments below!
FAQ Section
Can I make my table taller without buying new legs?
Yes, you can use furniture risers, bun feet, or PVC pipes to increase your table's height without purchasing new legs.
What's the easiest way to raise the height of a table?
The easiest method is using furniture risers, as they don't require tools and can be quickly placed under the table legs.
Can I use bed risers to make a table taller?
Yes, bed risers can be repurposed to elevate a table, as long as they provide stable support for the table's weight.
How can I make my table taller for standing work?
Consider using adjustable desk converters or installing new, longer legs to achieve a comfortable standing height.
What materials can I use to make my table taller?
Common materials include wood (for bun feet or new legs), plastic or metal (for furniture risers), and PVC pipes (for metal tables).

I am Sammy and I blog at Live it. Love it. Make it. It is creative lifestyle blog run by best friends H and Sammy. Head over and follow our crafty adventures!