In a world where uniqueness is increasingly cherished, yet hard to find, the quest for personal expression can be frustrating. Everywhere you look, it seems like everyone is wearing, doing, and making the same things. This sameness can feel stifling, leaving you craving a creative outlet that sets you apart. Picture this: a piece of jewelry that’s not just an accessory but a statement of your individuality. That’s where the magic of DIY bottlecap necklaces comes in.
These aren’t just necklaces; they’re a canvas for your creativity, a way to capture memories, showcase your style, and even make a statement. And the best part? You can create them right at home, with simple tools and a sprinkle of imagination with our article “How to Make Bottlecap Necklaces”. We’re about to dive into the world of making these unique, trendy necklaces, transforming ordinary bottle caps into extraordinary pieces of art. Get ready to unleash your creativity and make a fashion statement that’s truly your own.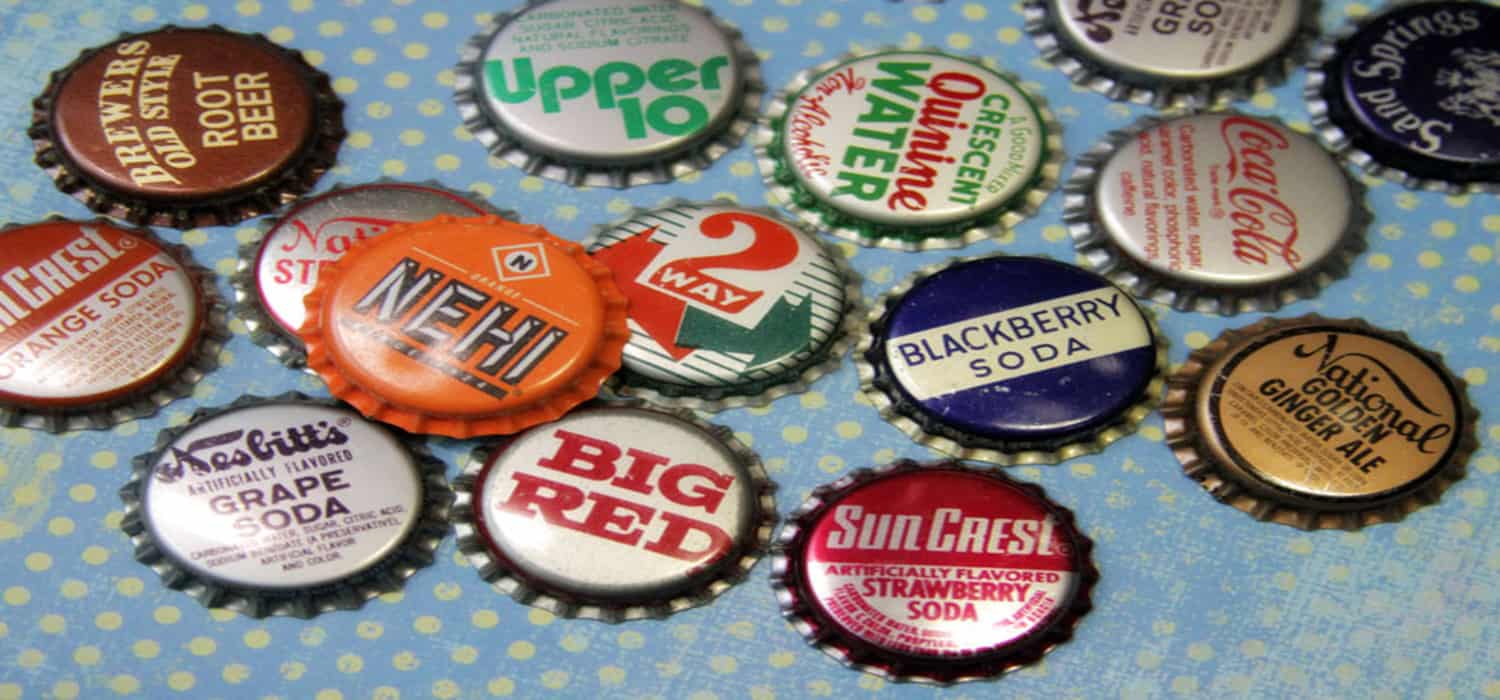
Flatten a bottlecap, drill a hole for a jump ring, and glue an image inside. Cover the image with clear resin for a glossy finish. Once dry, attach the jump ring and chain. Customize with different images, colors, and embellishments for a unique, personal touch.
What You Need: Materials and Tools
To embark on your journey of creating a unique bottlecap necklace, gathering the right materials and tools is your first step. Here’s a comprehensive list to get you started:
- Bottle Caps: Choose from a variety of colors and designs. You can recycle old bottle caps or buy new ones for a more uniform look.
- Images or Decorations: Select small photos, stickers, or any other flat decorations that resonate with your style.
- Resin or Clear Glaze: This is used to seal your image inside the bottle cap, giving it a glossy, professional finish.
- Adhesive: A strong glue like E6000 ensures your decorations stay put.
- Jump Rings: These small metal rings are crucial for attaching your bottle cap to the necklace chain.
- Chain or Cord: Select a chain, cord, or ribbon to hang your bottlecap pendant from.
- Basic Crafting Tools: Scissors, a hammer and nail (or a small drill), and pliers will be needed for assembly.
Remember, the charm of DIY crafts lies in their flexibility. Don’t hesitate to add your personal touch with unique embellishments or by experimenting with different materials. Each item on this list is a stepping stone towards creating a piece that’s distinctly ‘you’. So, let your creativity flow and watch as simple materials transform into a piece of wearable art.
Basic Technique: The Starter Necklace
Creating your first bottlecap necklace is an exciting foray into the world of DIY jewelry. Here’s a simple guide to get you started:
Prepare the Bottle Cap:
- Begin by selecting your bottle cap. If it’s not already flat, gently flatten it using a hammer.
- Next, drill or punch a hole near the edge of the cap. This is where the jump ring will go. Be careful to smooth any sharp edges.
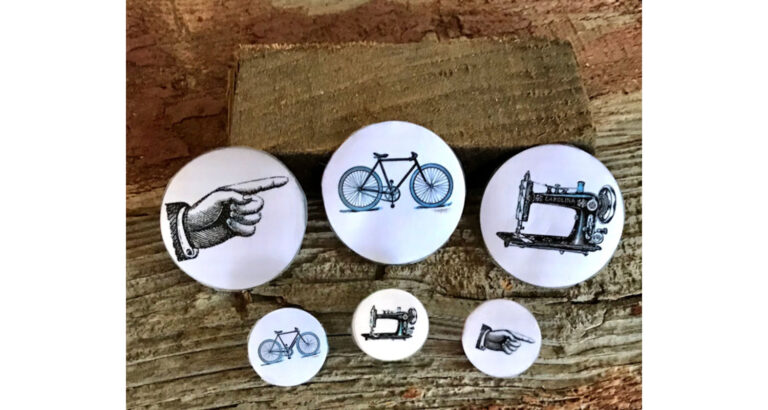
Choose and Secure Your Image:
- Select a small picture or design that fits inside the cap. You can use a 1-inch hole punch for a perfect fit.
- Glue the image inside the bottle cap. Ensure it’s centered and let the glue dry.
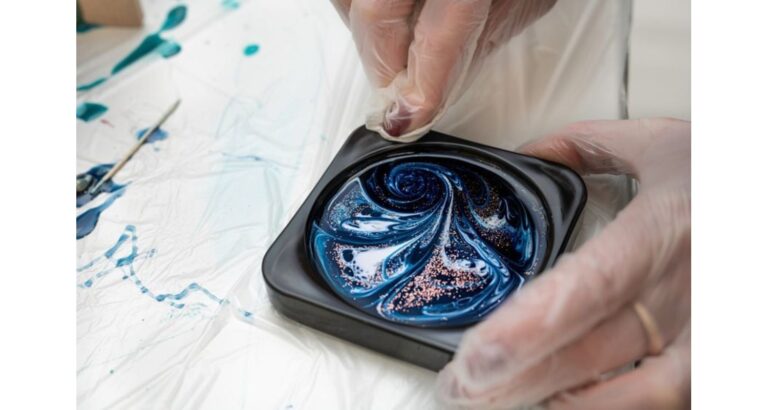
Adding the Resin:
- Carefully pour clear resin or glaze over the image, filling the cap to just below the rim.
- Remove any bubbles that may form by gently tapping the cap or using a needle to pop them. Let it dry completely.
Assembling the Necklace:
- Once the resin is dry, attach a jump ring through the hole you made.
- String the cap onto your chosen necklace chain or cord.
Personal Touch:
- Add any final touches, such as additional charms or beads, to personalize your necklace.
This basic technique lays the foundation for more complex and personalized designs. As you become more comfortable with the process, feel free to experiment with different images, cap styles, and embellishments. The beauty of DIY is in making something that truly represents you. Remember, the best creations come from enjoying the process, so have fun with your bottlecap necklaces!
Advanced Techniques: Elevating Your Necklace
Once you’ve mastered the basic bottlecap necklace, it’s time to elevate your craft with advanced techniques. These methods will add complexity and uniqueness to your bottlecap necklaces:
Layering and Texturing:
- Consider layering different materials inside the bottle cap. For example, start with a base image, add a layer of thin fabric or lace, and then secure it with resin. This creates depth and texture.
- Experiment with adding small beads, glitter, or sequins atop the first resin layer, then cover with a second layer of resin for a multidimensional effect.
Creating a Druzy Effect:
- For a faux druzy look, inspired by MomsandCrafters.com, pour a layer of Mod Podge or resin in the cap.
- Sprinkle fine glass glitter over the wet surface. Add a second layer of Mod Podge and more glitter. Once dry, this creates a sparkling, geode-like appearance.
Incorporating Mixed Media:
- Mix and match different media for a unique look. Attach small charms or use metal stamps to imprint designs onto the cap before adding your image and resin.
- Experiment with painting or distressing the bottle cap itself for a vintage or rustic effect.
Themed Designs:
- Create themed necklaces by choosing images and embellishments that reflect a particular interest, season, or event. For example, use festive images and colors for holiday-themed necklaces or incorporate elements of your favorite hobby or fandom.
Advanced Assembly:
- For a more professional finish, use jewelry findings like pendant bails instead of directly threading the chain through the jump ring.
- Consider using a combination of different chains or cords for a more intricate look.
These advanced techniques invite you to think outside the bottle cap, combining different materials and methods to create truly unique pieces. Each necklace you make is not just an accessory but a reflection of your artistic vision. So, let your imagination run wild and see where it takes your bottlecap necklace designs.
Design Inspirations and Variations
The beauty of making bottlecap necklaces lies in the endless possibilities for design and personalization. Here are some inspiring variations to spark your creativity:
Thematic Designs:
- Tailor your necklace to reflect personal interests, like music, literature, or travel. Use relevant images or tiny objects related to your theme.
- Seasonal themes are also popular, with designs featuring holiday motifs, autumnal colors, or summer beach scenes.
Vintage and Rustic Styles:
- For a vintage look, opt for sepia-toned images, lace, or old-fashioned patterns. Distressing the bottle cap edges can add to the antique feel.
- Rustic designs might include natural elements like tiny pressed flowers or images of wildlife, matched with earthy tones.
Modern and Abstract:
- Experiment with abstract designs, geometric patterns, or bold color blocks for a contemporary feel.
- Incorporate modern art elements or minimalistic designs for a sleek, stylish look.
Personal Mementos:
- Create necklaces with personal significance, like a tiny print of a family photo, a snippet of a cherished letter, or a small drawing by a loved one.
Charms and Add-Ons:
- Add extra charms, beads, or other decorative elements alongside the bottlecap to enhance its look and add movement.
Each design you choose adds a layer of meaning and style to your necklace. Whether you’re crafting for yourself, as a gift, or for an event, your bottlecap necklace can be a perfect expression of personality and creativity. Remember, the only limit is your imagination!
Expert Tips and Tricks Bottlecap Necklaces
To elevate your bottlecap necklace crafting, consider these expert tips and tricks, gleaned from various DIY enthusiasts and craft professionals:
Smooth Finishing:
- To prevent sharp edges after punching a hole in the cap, gently file the edges or use a nail buffer. This ensures the necklace is safe to wear.
Bubble-Free Resin:
- When working with resin, ensure a bubble-free finish by slowly pouring and using a toothpick to pop any bubbles that appear. Some crafters recommend warming the resin slightly before use to reduce bubbles.
Image Protection:
- If you’re using printed images, apply a thin layer of Mod Podge over the image to prevent ink from bleeding when you add resin.
Balanced Design:
- When adding charms or other elements, consider the balance and weight of the necklace. Too many additions on one side can make it uncomfortable to wear.
Color Coordination:
- Pay attention to color schemes. Complementary colors or thematic color palettes can make your design more visually appealing.
Test Layouts:
- Before finalizing your design, lay out all elements on a flat surface to get a visual of how they’ll look together. This helps in arranging components in the most aesthetically pleasing way.
Quality Materials:
- Invest in good quality jump rings and chains to ensure the longevity of your necklace. Weak materials can break easily and diminish the overall quality of your work.
Remember, these tips are meant to enhance your crafting experience. Don’t be afraid to experiment and learn from each project. Every creation is a step forward in your DIY journey!
Engaging with the Community: Share Your Creations
One of the most rewarding aspects of DIY crafting is sharing your creations and getting inspired by others. Encourage your readers to become part of a vibrant community of crafters:
Social Media Sharing:
- Create a hashtag for your readers to use when they post their bottlecap necklaces online. This not only showcases their work but also helps build a community of like-minded individuals.
Comment and Interact:
- Invite readers to comment on your post or website with pictures of their necklaces, tips, or questions. Engage with these comments to foster a supportive crafting environment.
Feature Creations:
- Consider featuring reader creations in future posts or on social media pages. This acknowledgment can be highly motivating and rewarding for your audience.
Crafting Challenges:
- Host periodic crafting challenges or contests with themes to keep the community engaged and creative.
By fostering this sense of community, you not only enhance the crafting experience but also create a space for inspiration, support, and new ideas.
In wrapping up our journey into the delightful world of DIY bottlecap necklaces, we’ve traversed the realms of creativity, individual expression, and community engagement. These charming necklaces aren’t just pieces of jewelry; they are personal statements, mementos of moments, and symbols of our uniqueness. Whether you’re a beginner taking your first steps into crafting or an experienced DIYer exploring new realms, remember that each necklace you create is a reflection of your creativity and style. Embrace the process, enjoy the learning curve, and cherish the outcome. And when you’re done, don’t forget to share your creations with the world. After all, in sharing, we not only showcase our own talents but inspire others to embark on their own creative journeys. So, pick up those bottlecaps and let your imagination run wild – the world is waiting to see what you’ll create next.
FAQ Section
What is the best adhesive to use for bottlecap necklaces?
For bottlecap necklaces, a strong adhesive like E6000 is ideal. It ensures that images and embellishments securely adhere to the metal surface and can withstand wear.
Can I use any type of image or paper in my bottlecap necklace?
Yes, you can use various types of images or paper, but ensure they are properly sealed. Applying a layer of Mod Podge over a printed image prevents ink bleeding when covered with resin.
How do I prevent resin from forming bubbles in my bottlecap necklace?
To avoid bubbles in resin, pour slowly and use a toothpick to pop any bubbles. Slightly warming the resin before use can also help reduce bubble formation.
What is the best way to flatten a bottlecap for a necklace?
Place the bottlecap on a hard surface and gently flatten it with a hammer. Use a piece of cloth or cardboard to avoid direct metal-to-metal contact and prevent scratches.
Can I add other elements like beads or charms to my bottlecap necklace?
Absolutely! Adding beads, charms, or other decorative elements enhances the uniqueness of your necklace. Attach them to the jump ring or alongside the bottlecap on the chain.

I am Sammy and I blog at Live it. Love it. Make it. It is creative lifestyle blog run by best friends H and Sammy. Head over and follow our crafty adventures!