Are you tired of dull, uninspired art pieces? Discover the vibrant world of resin art! This article will guide you through creating stunning, glossy masterpieces that will transform any space. Dive in and unleash your creativity!
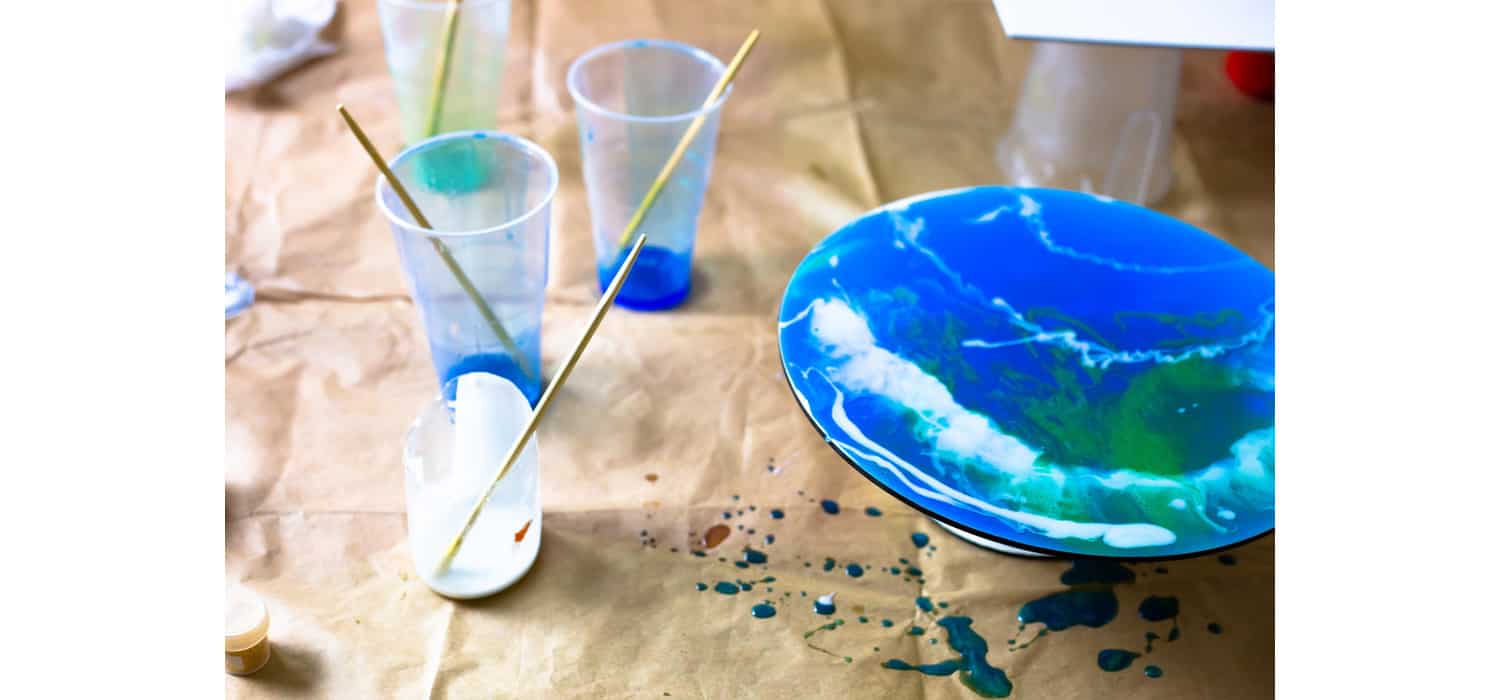
Mix clear epoxy resin with your choice of colors. Pour it onto a surface, creating your desired design. Use a heat gun to remove bubbles and enhance flow. Let it cure for 24 hours, and voilà, your resin art is ready!
Key Takeaways
- Grasp the essentials of resin art.
- Gather necessary materials and adhere to safety guidelines.
- Follow a comprehensive, step-by-step creation process.
Resin Art Basics
Resin art is a mesmerizing craft that combines color, creativity, and chemistry. Epoxy resin, the star of the show, is a two-component system consisting of resin and hardener. When mixed, they undergo a chemical reaction, resulting in a hard, clear, and glossy finish.  This versatile medium is perfect for encapsulating objects, creating stunning jewelry, or producing glossy coatings for paintings and coasters.
Materials Needed
Embarking on your resin art adventure requires some essential materials:
- Epoxy resin and hardener: The foundation of your art.
- Mixing cups and sticks: For combining resin and hardener.
- Nitrile gloves: To protect your hands from sticky resin.
- Protective eyewear and masks: Safety first! Keep your eyes and lungs safe from fumes.
- Colorants: Pigments, dyes, or even glitter to add vibrancy to your art.
- Molds or surfaces: Choose from silicone molds for jewelry or a canvas for paintings.
- Heat gun or torch: To pop any pesky bubbles in the resin.
With these materials in hand, you’re set to start your resin art journey.
Preparation Steps
Preparation is key to a successful resin art project:
- Choose a well-ventilated area: Resin fumes can be strong, so ensure proper ventilation.
- Protect your workspace: Cover surfaces with plastic sheets or silicone mats to catch drips.
- Wear protective gear: Don nitrile gloves, goggles, and a mask to safeguard your skin and lungs.
- Prepare your materials: Have all your tools and materials within reach for a smooth workflow.
Taking these preparatory steps seriously will set the stage for a safe and enjoyable resin art experience.
Also read: How To Widen Tight Sleeves Without Sewing: Easy Solutions
Mixing Resin
The magic begins when you mix the resin and hardener:
- Measure accurately: Use a 1:1 ratio of resin to hardener for most epoxy resins.
- Mix thoroughly: Stir slowly and steadily for about 3 to 5 minutes, scraping the sides and bottom of the mixing cup.
- Let it rest: Allow the mixture to sit for a few minutes to let bubbles rise to the surface.
Patience is crucial in this step to ensure a crystal-clear finish.
Designing Your Art Piece
This is where your creativity shines:
- Plan your design: Sketch out your ideas or gather inspiration from nature, abstract patterns, or anything that sparks your imagination.
- Choose your colors: Select a color scheme that resonates with your vision. Consider using complementary colors for contrast or analogous colors for harmony.
- Add embellishments: Incorporate glitter, dried flowers, or even small objects into your design for added texture and interest.
Remember, there are no rules in art, so let your creativity flow freely!
Pouring and Curing Process
Now it’s time to bring your vision to life:
- Pour the resin: Gently pour the mixed resin onto your surface or into your mold. Use a stick to guide the flow and create your desired patterns.
- Remove bubbles: Use a heat gun or torch to carefully pass over the surface, popping any bubbles that have formed.
- Cure: Allow your piece to cure in a dust-free environment. Depending on the resin, this can take anywhere from 12 to 72 hours.
Patience is key during the curing process, as it ensures a hard and durable finish.
Finishing Touches
Once your piece is fully cured, it’s time for the finishing touches:
- Demold: If you used a mold, gently remove your resin art from it.
- Sand edges: If necessary, sand any rough edges with fine-grit sandpaper for a smooth finish.
- Add hardware: For jewelry or hanging pieces, attach the appropriate hardware.
Your resin art is now ready to be admired and displayed!
Also Read: How To Make 3D Layered Paper Art
Advanced Techniques
As you gain confidence in your resin art skills, you can explore more advanced techniques to elevate your creations:
- Layering: Create depth by pouring resin in layers, allowing each layer to cure before adding the next. This technique is perfect for embedding objects or creating 3D effects.
- Swirling: Use a toothpick or a wooden stick to gently swirl different colored resins together, creating marbled or abstract patterns.
- Incorporating Mixed Media: Experiment with adding different materials like gold leaf, paper cutouts, or fabric to your resin for unique textures and designs.
Troubleshooting Common Issues
Even experienced resin artists encounter challenges. Here are some tips for dealing with common issues:
- Bubbles: If you notice bubbles after pouring, use a heat gun or a torch to gently pop them. For stubborn bubbles, try using a toothpick to poke them out.
- Sticky Resin: If your resin feels tacky after curing, it may not have been mixed properly or the temperature was too low. Try covering the sticky area with a fresh layer of properly mixed resin.
- Uneven Surfaces: To fix an uneven surface, sand it down with fine-grit sandpaper and then pour a new layer of resin on top.
Maintenance and Care
Resin art is durable, but it still requires some care to keep it looking its best:
- Cleaning: Wipe your resin pieces with a soft, damp cloth to remove dust. Avoid using harsh chemicals or abrasive materials.
- Storage: Store resin art away from direct sunlight and extreme temperatures to prevent yellowing and warping.
- Repair: If your resin piece gets scratched, you can often buff out the scratch with a fine-grit sandpaper and then apply a thin layer of resin for a glossy finish.
Conclusion
Congratulations! You’ve just embarked on a journey through the captivating world of resin art. This versatile medium offers endless possibilities for creativity and expression. Whether you’re making jewelry, coasters, or abstract art, the key is to let your imagination lead the way. Embrace the process, experiment with different techniques, and most importantly, have fun! Resin art is a rewarding and versatile craft that allows for endless creativity. Whether you’re a beginner or an experienced artist, there’s always something new to learn and explore. Remember to prioritize safety, take your time, and most importantly, enjoy the process. Share your resin art creations with the world and inspire others to start their own resin art journey!
Also read: What To Do With Old Sewing Machine: Knowing It’s Value
FAQ’s
How do dahlias vary in size, shape, and color?
Dahlias come in over 40 species, offering a wide range of sizes, shapes, and colors. From small to 'dinner plate' sizes, their shapes can be simple or complex, and colors range from bold to soft pastels .
How to store dahlia tubers in winter?
Store dahlia tubers in a cool, dry place. Pack them in peat moss or sand to prevent drying out. Check periodically for rot or desiccation .
Best time to plant dahlias?
Plant dahlias in spring when the danger of frost has passed. This ensures they have a warm and stable environment to thrive in .
How to explore Stuðlagil ravine best?
Stuðlagil ravine is best explored by hiking to enjoy its spectacular columnar basalt walls. It's a bit remote, so be prepared for a more secluded experience .
What wildlife lives near Stuðlagil ravine?
The area around Stuðlagil ravine is home to diverse wildlife, including birds and possibly small mammals native to the Icelandic countryside .

I am Sammy and I blog at Live it. Love it. Make it. It is creative lifestyle blog run by best friends H and Sammy. Head over and follow our crafty adventures!


