“Sharp sewing scissors are the unsung heroes of every crafter and seamstress’s toolkit, ensuring precise cuts and flawless creations. This guide will delve into “how to sharpen sewing scissors.” We will also discuss some effective tips and techniques for sharpening your sewing scissors. Additionally, it helps you maintain their cutting edge and elevate your craft to the next level.
To sharpen sewing scissors effectively, try the aluminum foil method: Cut a folded strip of aluminum foil multiple times. Alternatively, a specialized scissor sharpener or sharpening stone can be used. Regular maintenance ensures clean cuts for sewing and crafting projects, enhancing your precision and enjoyment of these activities.
For those who value precise cutting in sewing and crafting, it’s essential to check out an article on “How to Sharpen Sewing Scissors: Effective Tips”. By reading this article, you can discover effective tips that will help you extend the lifespan of your scissors, save money on replacements, and elevate the quality of your creative projects. Furthermore, this article is highly recommended for craft enthusiasts who want to take their skills to the next level.
Grasping Your Scissors: From Texture to Paper
Scissors are a universal device in our routines, yet not all scissors are equivalent. Whether you’re into sewing, creating, or need a dependable pair for everyday errands, understanding the subtleties between different scissors is fundamental. In this investigation, we’ll dive into the vital contrasts between texture and paper scissors, analyze the life systems of scissor-cutting edges, and figure out how to keep up with and sharpen your sewing scissors utilizing the sandpaper strategy.
See Also: How To Shorten A Dress Without Sewing: Quick & Easy Guide
The Qualification: Texture versus Paper Scissors
Upon initial observation, it may appear that scissors are adaptable tools with numerous applications. Nevertheless, it is essential to keep in mind that scissors are designed for specific tasks, and using them on the wrong material can lead to subpar results or even cause damage. For example, fabric scissors and paper scissors serve as prime examples of this distinction. In essence, it is crucial to use the appropriate scissors for each task to ensure optimal outcomes.
Texture Scissors:
These specific scissors are intended for slicing through different textures, including cotton, silk, and fleece, and that’s just the beginning. Also, they highlight sharp cutting edges that quickly cut through the surface without fraying or catching. 
The pivotal distinction lies in the short edge, frequently serrated or micro-serrated, to hold the texture and guarantee neatness. Furthermore, texture scissors usually are longer than their paper partners, giving more influence and control while cutting huge bits of texture.
Paper Scissors:
On the one hand, paper scissors are specifically designed for cutting paper, cardboard, and other lightweight materials. On the other hand, their cutting edges are mostly straight and level, enabling accurate cuts without the serrations found on texture scissors. Additionally, they are easy to use and provide a smooth cutting experience. Therefore, they are a must-have tool for anyone who frequently works with paper or similar materials.
Utilizing paper scissors on texture can bring about frayed edges, crooked cuts, and a dulling of the cutting edge because of the rough idea of textures.
How to sharpen sewing scissors: Life Systems of a Scissor Edge
Understanding the life systems of scissor edges is critical in appreciating how they work and how to keep up with them. A regular scissor cutting edge comprises the following parts: 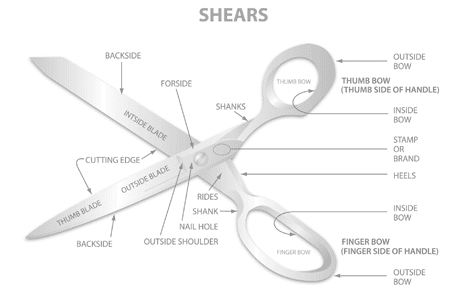
Edge:
The prolonged sharpened part of the scissor makes the genuine cut. However, depending on the intended use, it may be straight, serrated, or micro-serrated. In addition, the cutting edge is the sharpest part and is responsible for the cutting process. Therefore, it is crucial to keep this edge in ideal condition for effective cutting.
Shears:
These are the two parts of the scissor, containing the cutting edge and the other filling in as a handle. The shears turn to a central issue called support.
Support:
The pivot point is where the shears turn during cutting. In addition, it is important to have an appropriate arrangement of support for smooth and easy cutting. This can be achieved by considering the correct positioning and stability of the object being cut. Furthermore, having a comfortable grip and applying the correct amount of pressure can also contribute to an efficient cutting experience.
Handles:
To begin with, the handles of the scissors are precisely where you grip them. In addition, ergonomically designed handles ensure comfortable use, particularly during extended cutting sessions. Furthermore, these handles provide an excellent grip, allowing you to use the scissors more effectively. Additionally, they are designed to reduce the strain on your fingers, making it easier and more comfortable to use the scissors for a more extended period. Lastly, the handles make cutting more efficient, making the task less tiring and more convenient for you.
Tang:
The tang, which is the metal extension connecting the blade to the handles, often features a hole for hanging or storing the scissors when not in use. Additionally, the tang can provide better balance and control for the user during cutting tasks. The best sewing scissors can lose their edge. Therefore, when your scissors feel dull and need to be cut neatly, now is the right time to sharpen them. Furthermore, the sandpaper procedure is one cost-effective and clear strategy for sharpening sewing scissors. This is the way to make it happen:
Materials Required:
Take a look.
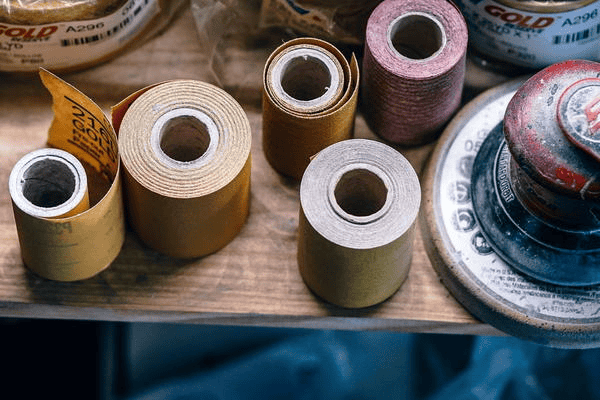
Fine Grit Sandpaper:
You’ll require sandpaper with a coarseness somewhere between 600 and 1,000 since this fine coarseness is sufficiently delicate to sharpen the edge without causing harm.
Scissors to Be sharpened:
Guarantee you have the sewing scissors you need to sharpen.
Wooden Block or Dowel:
A wooden block or dowel will be a sponsorship to help the sandpaper and give a steady surface for sharpening.
Steps:
Follow these.
Set up the Sandpaper:
Cut a piece of fine-grit sandpaper roughly 2 inches wide and 6 inches long. Therefore, guarantee it’s sufficiently long to cover the whole length of the scissor’s sharp edge.
Secure the Sandpaper:
Wrap one finish of the sandpaper strip around the wooden block or dowel, getting it set up. Ensure the grating side faces outward.
Open the Scissors:
Open your sewing scissors completely, uncovering the whole length of the edge.
Sharpen the Cutting edge:
Holding the wooden block with sandpaper in one hand, cautiously coast the cutting edge of the scissors along the sandpaper at a slight point. Then, utilize delicate, even strokes, moving from the foundation of the sharp edge to the tip. Rehash this movement a few times, guaranteeing you cover the whole edge uniformly.
Test the Sharpness:
After sharpening, close the scissors and test them on a texture. You ought to see a critical improvement in their cutting execution.
Clean and Oil:
Eliminate any lingering sandpaper coarseness from the scissors and softly oil the sharp edge to forestall rusting and keep up with smooth cutting.
The sandpaper procedure is a primary yet compelling method for reviving your sewing scissors without requiring proficient sharpening instruments. Ordinary upkeep of your scissors will save them sharp and prepare for your creating and sewing projects.
See Also: What Is A Nap In Sewing? Understanding Sewing Terminology
Step by Step Directions for sharpening Scissors: Aluminum Foil Technique
Keeping your scissors sharp is fundamental for exact cutting in different assignments, from making to sewing. One powerful technique for sharpening scissors at home is utilizing aluminum foil. Here is a step-by-step explanation of the most effective way to accomplish it: 
Materials Required:
Aluminum Foil: You’ll require a piece of aluminum foil, ideally a foot long or more.
Scissors to Be sharpened: Accumulate the scissors you need to sharpen.
Step-by-Step Guidelines:
1. Set up the Aluminum Foil:
Begin by cutting a piece of aluminum foil. It ought to be one foot long. Crease it in half the long way to make a double-layered strip. The foil should be sufficiently long to make a few cuts with scissors.
2. Crease the Foil:
Overlay the aluminum foil strip again, making a thicker, four-layered strip. This will give better obstruction when you slice through it.
3. Open the Scissors:
Completely open the scissors you plan to sharpen. Guarantee the whole length of the cutting edge is available.
4. Begin Cutting:
Firstly, the old finish of the collapsed aluminum foil strip in one hand and the scissors in the other. Position the scissors at the collapsed finish of the foil strip and slice through it. Additionally, apply tension as though cutting through a piece of texture. Now, rehash this cutting movement a few times. You should distinguish how easily the scissors slice through the foil.
5. Test the Scissors:
After making a few slices through the aluminum foil, close the scissors and test them on scrap texture or paper. You ought to see an impressive improvement in their cutting execution.
6. Clean and Oil the Sharp edges:
Eliminate any aluminum foil buildup from the sharp edges of the scissors. To forestall rusting and keep up with smooth cutting, softly oil the sharp edges with sewing machine oil or any light machine oil. Clear off any overabundance of oil with a perfect material.
See Also: How To Make Pants Waist Smaller Without Sewing: Simple Tricks
Step by Step Guidelines for sharpening Scissors: Steel Fleece Cleanser Cushion Method
A steel fleece cleanser cushion is another compelling method for sharpening scissors at home. This strategy sharpens the sharp edges as well as assists in removing any rusting or grime. Here is a step-by-step guide on the most proficient method to make it happen:
Materials Required:
- Steel Fleece Cleanser Cushion: You’ll require a steel fleece cleanser cushion, for example, used for family cleaning.
- Scissors to Be sharpened: Accumulate the scissors you need to sharpen.
- Water and Cleanser: Have a bowl of water and a gentle dishwashing cleanser nearby for cleaning.
Step by Step Directions
1. Set up the Steel Fleece Cushion:
Start by wetting the steel fleece cleanser cushion with a touch of water. You maintain that it should be moist, however, not trickling wet.
2. Open the Scissors:
Completely open the scissors you mean to sharpen. This guarantees admittance to the whole length of the sharp edge.
3. Scour the Edges:
Hold the wet steel fleece cleanser cushion in one hand and the scissors in the other. Tenderly clean the sharp edges of the scissors with the steel fleece cushion. Utilize a back-and-forth movement, applying slight tension.
4. Flush and Clean:
Flush the scissors underwater to eliminate any steel fleece buildup and cleanser. Examine the cutting edges to guarantee they are spotless and liberated from rust or trash.
5. Test the Scissors:
Close the scissors and test them on scrap texture or paper. You ought to see a vast improvement in their ability to cut.
6. Dry and Oil the Cutting edges:
Completely dry the scissors with a spotless, dry fabric. Then, gently oil the sharp edges with sewing machine oil or any light machine oil to forestall rusting and keep up with smooth cutting. Therefore, clear off any overabundance of oil with a perfect fabric.
Step by Step Directions for sharpening Scissors: Bricklayer Container Method
Keeping your scissors sharp is fundamental for exact cutting in different errands, from creating to sewing. Since the Bricklayer container strategy is a straightforward and compelling technique for sharpening scissors at home. Here is a step-by-step guide on the best way to make it happen:
Materials Required:
- Bricklayer Container:
You’ll require a perfect, void Artisan container with a cover.
- Scissors to Be sharpened:
Assemble the scissors you need to sharpen.
Step by Step Directions:
1. Set up the Bricklayer Container:
Guarantee the Bricklayer container is perfect and dry. Eliminate any names or deposits from the container if necessary. If your Bricklayer container has a top, ensure it’s safely secured.
2. Open the Scissors:
Completely open the scissors you mean to sharpen. This guarantees admittance to the whole length of the sharp edge.
3. Cut the Container Top:
Hold the Artisan container in one hand and the scissors in the other. Position the scissors at the edge of the Bricklayer container top, close to the middle. Make a few slices through the cover utilizing a consistent, even movement. Apply tension as though you were slicing through a piece of texture. Rehash this cutting movement a few times, making a point to cover the whole length of the sharp edges.
4. Turn the Scissors:
After slicing through the top occasionally, turn the scissors marginally and cut through the cover somewhere unexpected. This guarantees that the whole cutting edge gets sharpened equitably.
5. Test the Scissors:
After utilizing the Bricklayer container cover as a sharpening surface, close the scissors and test them on scrap texture or paper. You ought to see a vast improvement in their cutting execution.
6. Clean and Oil the Cutting edges:
Eliminate any top buildup from the scissor sharp edges. To forestall rusting and keep up with smooth cutting, gently oil the edges with sewing machine oil or any light machine oil. Clear off any overabundance of oil with a spotless fabric.
Step by Step Directions for sharpening Scissors: Screwdriver Strategy
The screwdriver strategy is one more successful method for sharpening scissors at home, particularly if you don’t have specific sharpening devices. Here is a step-by-step guide on the best way to make it happen: 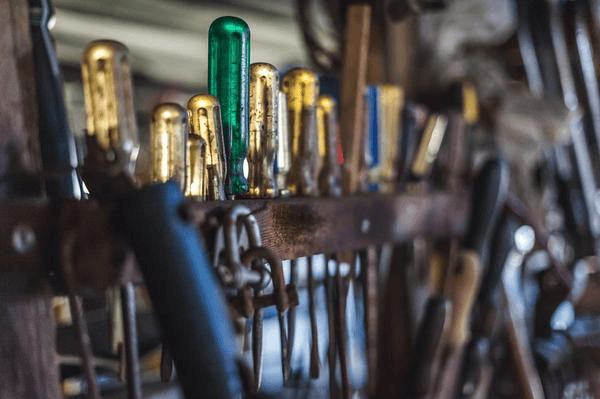
Materials Required:
Screwdriver: A flathead screwdriver with a sensibly wide cutting edge will be required.
Scissors to Be sharpened: Accumulate the scissors you need to sharpen.
Step-by-Step Guidelines:
1. Open the Scissors:
Completely open the scissors you expect to sharpen. This guarantees admittance to the whole length of the edge.
2. Position the Screwdriver:
Hold the screwdriver in one hand and the scissors in the other. Position the screwdriver’s level cutting edge against one of the scissor edges, close to the base (where the sharp edges meet). Guarantee the screwdriver is at a slight point, not opposite to the sharp edge. The objective is to make a slanted edge along the edge’s internal surface.
3. Sharpen the Sharp edge:
Apply delicate tension with the screwdriver and make long, clearing movements along the internal surface of the scissor edge. Move from the foundation of the sharp edge toward the tip, keeping a predictable point. Rehash this movement a few times, making a point to cover the whole length of the sharp edge.
4. Turn and Rehash:
After sharpening one side of the scissor cutting edge, pivot the scissors and rehash the cycle on the other cutting edge. Guarantee the two edges are sharpened equitably for adjusted cutting.
5. Test the Scissors:
After involving the screwdriver as a sharpening device, close the scissors and test them on scrap texture or paper. You ought to see a critical improvement in their cutting skill.
6. Clean and Oil the Sharp edges:
Eliminate any metal shavings or buildup from the scissor’s sharp edges. To forestall rusting and keep up with smooth cutting, daintily oil the sharp edges with sewing machine oil or any light machine oil. Clear off any overabundance of oil with a spotless fabric.
See Also: Who Buys Used Sewing Machines Near Me? Top Places To Sell
Step by Step Directions for sharpening Scissors: Scissor Sharpener Instrument
If you lean toward a specific device for sharpening your scissors, a scissor sharpener is a helpful decision. Here is a step-by-step guide on the best way to utilize a scissor sharpener: 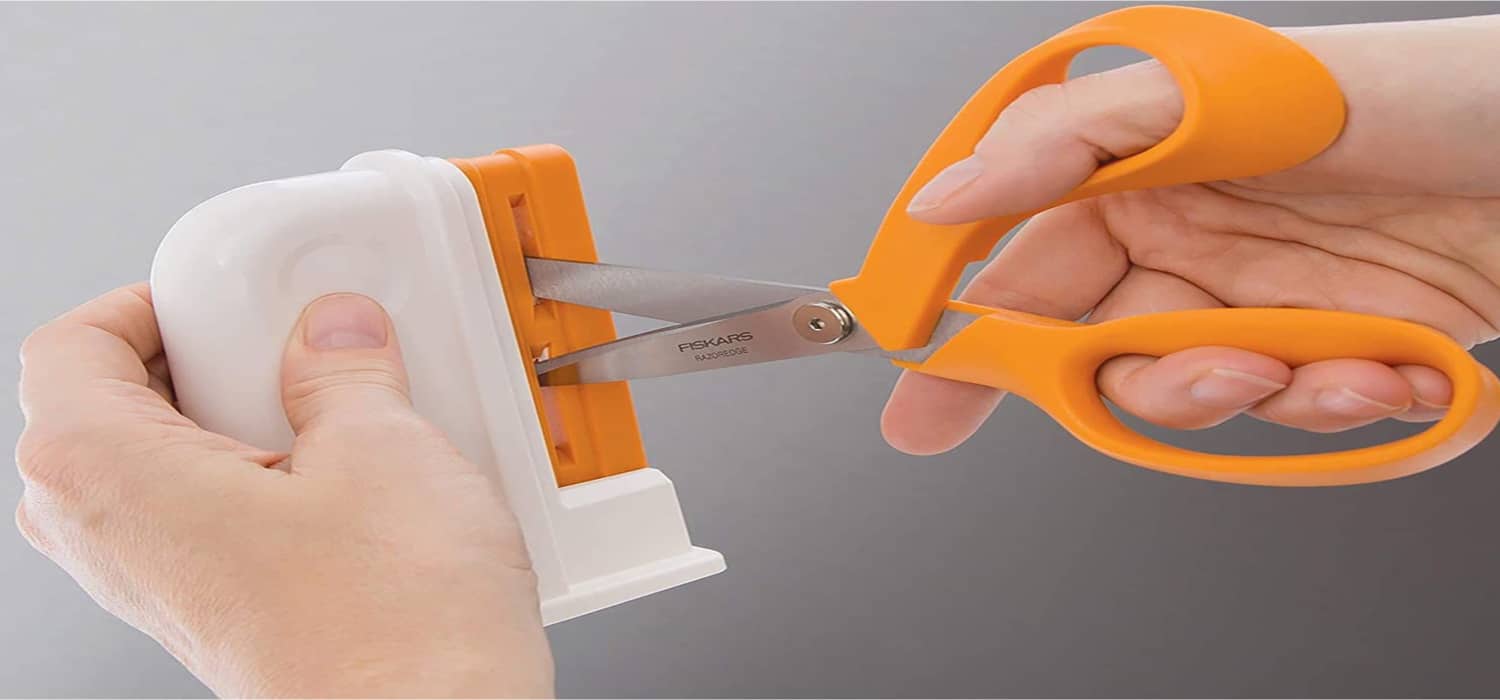
Materials Required:
Scissor Sharpener Instrument: Get a scissor sharpener, which is planned explicitly for sharpening scissors.
Step-by-Step Guidelines:
1. Set up the Scissor Sharpener:
Peruse the maker’s directions accompanying the Sharpener to grasp its particular use. Guarantee that the Sharpener is spotless and in great shape.
2. Open the Scissors:
Completely open the scissors you plan to sharpen. This gives admittance to the whole length of the cutting edge.
3. Position the Scissors in the Sharpener:
Adhere to the Sharpener’s guidelines to appropriately situate the scissors inside the apparatus. The Sharpener ought to safely hold the scissors set up.
4. Begin sharpening:
Contingent upon the sort of scissor sharpener you have, you might have to keep explicit rules. By and large, most scissor sharpeners include a crushing or sharpening movement. Firstly, tenderly press the scissors’ handles together as you move the cutting edges through the Sharpener. Secondly, the Sharpener will eliminate material from the cutting edge, reestablishing its sharp edge. Follow any suggested number of passes or strokes shown in the Sharpener’s guidelines.
5. Test the Scissors:
After sharpening, close the scissors and test them on scrap texture or paper. You ought to see a critical improvement in their cutting execution.
6. Clean and Oil the Sharp edges:
Eliminate any sharpening buildup or metal shavings from the scissor’s sharp edges. To forestall rusting and keep up with smooth cutting, softly oil the edges with sewing machine oil or any light machine oil. Clear off any overabundance of oil with a spotless fabric.
Progressed sharpening: Utilizing a sharpening Stone
Utilizing a sharpening stone can give superb outcomes for those looking for a much further developed strategy for sharpening scissors. This is an aide en route to use a sharpening stone to sharpen scissors: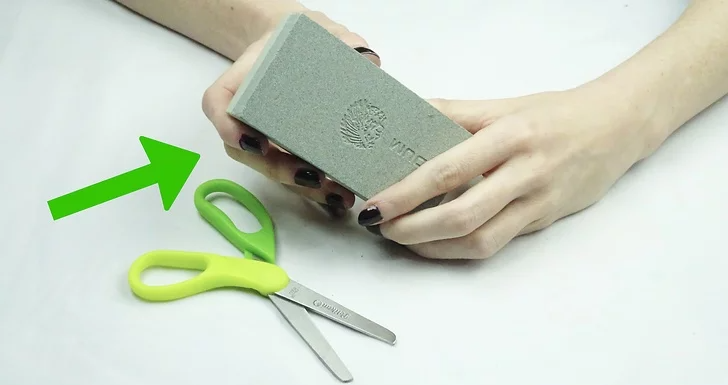
Advantages of Utilizing a Sharpening Stone:
Before plunging into the guidelines, it merits featuring the advantages of utilizing a sharpening stone for scissor sharpening:
Accuracy: Sharpening stones consider exact command over the sharpening system, guaranteeing the edge is sharpened flawlessly.
Life span: Moreover, customary utilization of a sharpening stone can broaden the life expectancy of your scissors by keeping a steady edge.
Flexibility: Sharpening stones can be utilized for different cutting edges, making them an adaptable device for the home.
Step-by-Step Guidelines:
1. Select the sharpening Stone:
Pick a sharpening stone with a fine or medium coarseness. Wet the stone as indicated by the producer’s guidelines.
2. Open the Scissors: Completely open the scissors you expect to sharpen to uncover the sharp edge.
3. Position the Scissors: Place the sharpening stone on a stable surface. Hold one blade of the scissors at a slight angle on the stone and sweep the sharp edge across it gently in a sweeping motion.
4. Substitute Sides: By making a few passes on one edge of the scissors, flip them over to sharpen the other edge using the same sweeping motion. Repeat this process several times, alternating between the two edges until you achieve a sharp edge. Sharpen scissors by making multiple passes. Additionally, you may find it helpful to use a sharpening stone or other tool to further enhance the sharpness of the scissors.
5. Test the Scissors: Close the scissors and test them on scrap texture or paper. You ought to see a critical improvement in their ability to cut.
6. Clean and Oil the Sharp edges: Firstly, it is crucial to eliminate any sharpening buildup from the edges of your scissors to maintain their sharpness. To achieve this, use a sharpening stone or a file to remove any accumulated buildup over time. Secondly, to prevent rusting and ensure smooth cutting, apply a small amount of sewing machine oil or any light machine oil to the edges of the scissors. It helps to keep them lubricated and prevent them from becoming dull. Finally, wipe off any excess oil with a clean cloth to prevent it from accumulating on the blades. This will help to ensure that your scissors remain in good condition and last for a long time.
How to sharpen sewing scissors: Extra Tips and Deceives
To guarantee your scissors stay sharp and work well for you, think about the accompanying extra tips and deceives: 
Keeping up with the Sharpness of Your Scissors:
- Store your scissors in a dry climate to forestall rust.
- Clean the scissors routinely to eliminate any trash or cement deposits.
- Avoid using scissors on excessively intense or rough materials, which can rapidly dull the sharp edges.
Regular Mix-ups to Stay away from:
- Abstain from using inappropriate sharpening apparatuses or techniques, which can harm the scissors.
- Don’t oversharpen your scissors. Adhere to the suggested rules for sharpening recurrence.
See Also: Sewing Projects For Adults: Inspiring Ideas For 2023
When to Think about Proficient Sharpening:
- If your scissors have broad harm or are incredibly dull, looking for proficient sharpening administrations could be ideal.
- Proficient sharpening can assist with reestablishing seriously harmed scissors to their ideal condition.
FAQs on how to sharpen fabric scissors at home
We are presenting you with some FAQs on how to sharpen scissors.
How do you sharpen fabric scissors?
Fabric scissors can be sharpened using aluminum foil, specialized scissor sharpeners, or even a sharpening stone. Each method involves different steps but aims to restore the scissors' cutting edge.
Can you sharpen scissors with a knife sharpener?
Yes, you can sharpen scissors with a knife sharpener, but it's not ideal. Since scissors have different blade angles and require a specialized scissor sharpener or sharpening techniques tailored to their design for the best results.
Is sharpening sewing scissors easy?
Sharpening sewing scissors with the right tools and techniques can be relatively easy. Moreover, methods like using a scissor sharpener, sharpening stone, or aluminum foil technique are accessible options for maintaining scissor sharpness at home.
Does sharpening fabric scissors help?
Yes, sharpening fabric scissors can significantly improve their cutting performance. Also, dull scissors can lead to frayed edges and uneven cuts in fabrics. Moreover, correctly pointed scissors ensure clean, precise cuts, making them a valuable tool for sewing and crafting.
Conclusion
To conclude, sharpening sewing scissors is a simple task that requires attention to detail. In addition, it’s essential to emphasize the importance of having sharp scissors, especially in precise cutting tasks. Furthermore, sharp scissors are vital tools for various crafting, sewing, and daily activities. Therefore, it’s crucial to check and maintain their sharpness regularly. By using simple techniques or specialized tools, you can keep your scissors sharp and dependable for a long time. In summary, paying close attention to this critical aspect of scissor care is crucial for anyone who wants to achieve precise cuts without damaging their materials.

I am Sammy and I blog at Live it. Love it. Make it. It is creative lifestyle blog run by best friends H and Sammy. Head over and follow our crafty adventures!