Imagine unlocking a world of creativity and fun, right in your kitchen, without needing to rush to the store. DIY playdough is not just an activity; it’s a passport to endless imagination for you and the little ones. In this quick guide, we’ll dive into the simplest, most effective way to create vibrant, soft playdough that promises hours of fun.
To make playdough at home, mix flour, salt, cream of tartar, water, and oil in a pot. Cook over medium heat until the mixture forms a dough, then knead until smooth. Add food coloring for fun!
Key Takeaways
- Making DIY playdough is a simple, fun activity that can be done with common kitchen ingredients.
- The essential ingredients for homemade playdough include flour, salt, cream of tartar, water, and oil, which are mixed and cooked until they form a dough.
- Adding food coloring allows for the creation of playdough in a variety of vibrant colors, enhancing the creative play experience.
- Homemade playdough is not only cost-effective but also safe and non-toxic, making it an excellent choice for children’s play.
- The process of making playdough can also be an educational experience, teaching children about measurements, mixing, and the transformation of materials.
Also read: How To Make A Scarf Out Of A Shirt: Simple Upcycling Tips
The Basics of DIY Playdough
Creating DIY playdough is a straightforward process that brings together creativity and learning in a hands-on activity. It starts with gathering your ingredients: flour, salt, cream of tartar, water, and oil. These ingredients are staples in most kitchens, making it easy to whip up a batch of playdough whenever the mood strikes.
The first step is to mix the dry ingredients together in a pot. Then, you’ll add the water and oil, stirring the mixture over medium heat. The heat helps the ingredients combine and thicken into a dough-like consistency. If you’re adding color, food coloring can be mixed in at any stage, allowing for customization and creativity in the playdough’s appearance.
The cooking process is quick, typically taking less than 10 minutes. Once the dough has formed, it’s removed from the heat and allowed to cool. Kneading the dough after it cools is crucial for achieving the perfect texture—soft, pliable, and ready for play.
Homemade playdough not only offers a fun and creative activity but also has several benefits. It’s cost-effective, safe, and can be made in large batches for endless hours of play. Moreover, the process of making playdough can be a mini science lesson for kids, demonstrating the transformation of materials through mixing and heating.
Also read: How To Remove Label Glue From Glass: Effective Methods
Gather Your Ingredients
You’ll need the following:
- Flour: This is the base of your playdough, providing structure.
- Salt: Acts as a preservative, extending the life of your playdough.
- Cream of Tartar: Improves elasticity and helps with preservation.
- Warm Water: Binds the ingredients together.
- Vegetable Oil: Adds smoothness, preventing the dough from drying out.
- Food Coloring (optional): For adding vibrant colors to your playdough.
Mix Dry Ingredients
Start by combining the flour, salt, and cream of tartar in a large pot. Stir these dry ingredients together until they are well mixed.
Add Wet Ingredients
Into the pot, pour the warm water and vegetable oil. If you’re planning to make one uniform color of playdough, this is the perfect time to add your food coloring to the water before mixing it with the dry ingredients.
Cook the Mixture
Place the pot over medium heat on the stove. Stir continuously as the mixture begins to thicken. This process usually takes about 5 minutes. You’ll notice the dough starting to form, pulling away from the sides of the pot and clumping together.
Knead the Dough
Once the dough has cooled down enough to handle, turn it out onto a clean surface. Begin kneading the dough to improve its texture and elasticity. If the dough feels too sticky, you can add a little more flour as you knead. This step is essential for achieving that perfect playdough consistency.
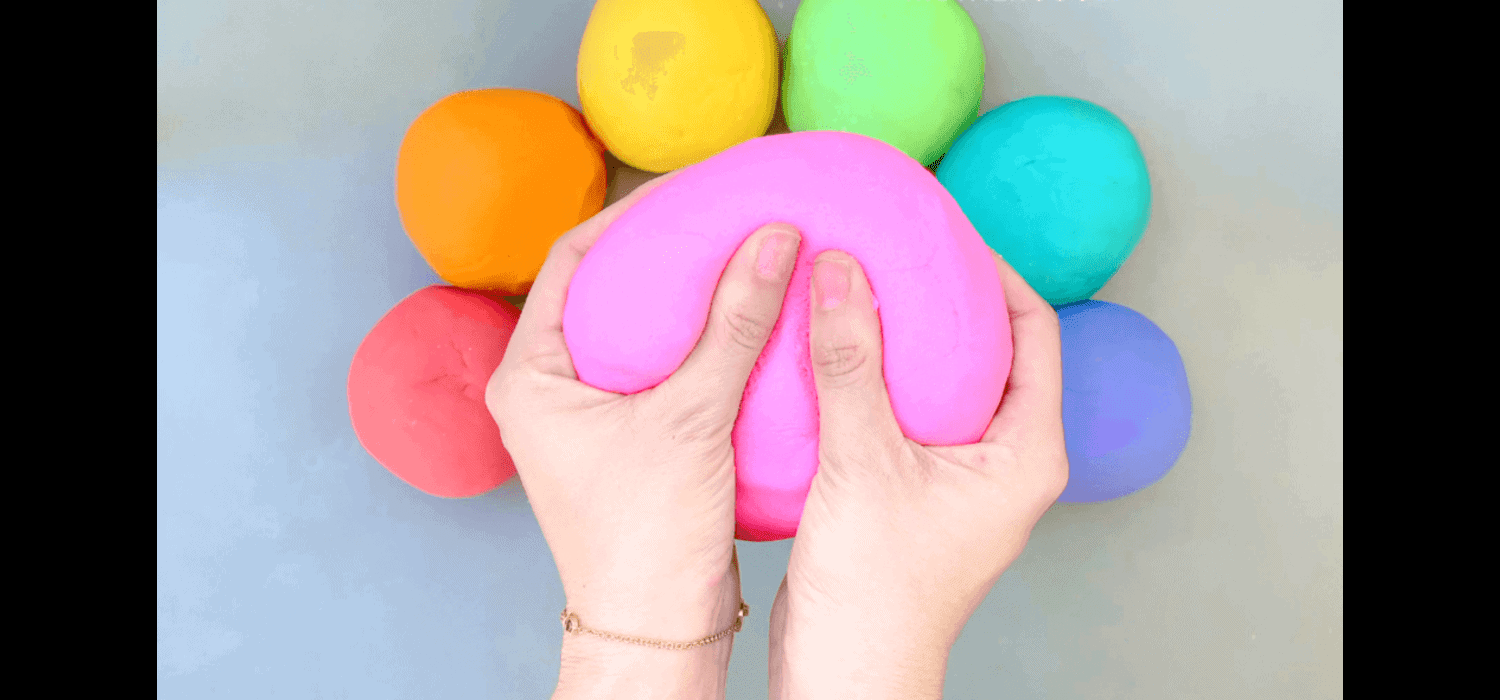
Color Your Playdough
If you didn’t add food coloring earlier, you could divide the dough into portions and knead in different colors. Make a well in the center of each portion and add a few drops of food coloring. Knead the dough until the color is evenly distributed. Wearing gloves can help prevent your hands from staining.
Storage
Playdough can dry out quickly, so it’s important to store it properly. Place each color of playdough in a separate airtight container or wrap it tightly in plastic wrap. Stored this way, your homemade playdough can last for several months.
Also read: How To Make Bottlecap Necklaces: Creative DIY Designs
Tips for Success
- For vibrant colors, gel food coloring is more effective than liquid.
- If your playdough dries out over time, adding a few drops of water can help restore its softness.
- Making playdough is a fantastic sensory activity for kids, but it also offers a chance to teach measurements and the science of materials changing states.
Making your own playdough is not just about saving money or avoiding store-bought playdough’s chemicals; it’s about engaging in a creative, hands-on activity that sparks joy and learning. This easy-to-follow process ensures you’ll have high-quality, custom playdough for all sorts of play and learning activities.
Also read: How To Restuff Couch Cushions For Comfort & Durability
Storing and Reviving Playdough
To ensure your DIY playdough retains its softness and usability for months, proper storage is key. Once you’ve finished playing, store the playdough in airtight containers or ziplock bags. Removing as much air as possible before sealing will help prevent drying. Store in a cool, dry place to maintain its consistency. If the playdough starts to dry out, you can revive it by kneading a few drops of water into the dough until it regains its original texture. For playdough that has become too sticky, adding a small amount of flour can help restore the balance.
Creative Uses for DIY Playdough
DIY playdough isn’t just for traditional modeling and play. Its versatility allows for numerous creative applications:
- Educational Tools: Create shapes, numbers, and letters to aid in learning.
- Art Projects: Mix colors to explore color theory or use tools to texture and pattern for intricate art pieces.
- Sensory Play: Enhance sensory development with playdough that has different scents (using essential oils or flavored extracts) and textures (by adding items like rice or beads).
- Custom Gifts: Craft personalized ornaments or handprints, which can be dried to create keepsakes.
- Therapeutic Use: Use as a stress-relieving tool for both children and adults, enhancing focus and calming nerves.
Troubleshooting Common Playdough Problems
- Too Sticky: If your playdough is too sticky, gradually knead in more flour until the desired consistency is reached.
- Too Dry or Crumbly: Add a few drops of water or oil and knead thoroughly. For severely dried playdough, wrapping it in a damp cloth before placing it in an airtight container can help reintroduce moisture.
- Color Fading: To revive faded playdough, knead in a few drops of the original or new food coloring. Protect playdough from direct sunlight to prevent fading.
- Salt Crystals Forming: If you notice salt crystals on the playdough surface, knead the dough until they dissolve. This is common in playdough stored for extended periods but doesn’t affect its play quality.
Conclusion
Crafting DIY playdough at home offers more than just a playful activity; it’s a gateway to creativity, learning, and sensory exploration. By following the simple steps outlined, anyone can create a versatile, safe, and customizable play material that encourages imaginative play and developmental growth in children. The process of making, storing, and even reviving playdough provides invaluable teaching moments about the science of materials, the art of colors, and the importance of sustainability through reuse and revitalization. Moreover, the endless possibilities for educational and creative uses of DIY playdough make it a staple in both homes and classrooms. Embrace the opportunity to create memories and learning experiences that will last a lifetime, proving that sometimes, the simplest activities can lead to the richest educational opportunities.
Also read: How To Make Bottle Cap Magnets: Easy Crafting Ideas
FAQ’s
What are the essential ingredients for homemade playdough?
Homemade playdough requires basic pantry staples: all-purpose flour, salt, cream of tartar for elasticity, warm water, and vegetable oil for smoothness. Adding food coloring is optional for vibrant, colorful dough.
Can I make playdough without cream of tartar?
Yes, you can substitute cream of tartar with lemon juice or vinegar to maintain the dough's elasticity, though cream of tartar offers the best texture and longevity for your playdough creations.
How can I naturally color my DIY playdough?
For natural dyes, use turmeric for yellow, beet juice for red, and spinach juice for green. These provide a safe, toxin-free way to introduce colors to your playdough, perfect for sensory play.
Is homemade playdough safe for toddlers?
Absolutely. DIY playdough made with food-grade ingredients is non-toxic, making it a safe choice for younger children. However, supervision is recommended to prevent ingestion, especially with very young kids.
How long can I store homemade playdough?
Properly stored in an airtight container or ziplock bag, your homemade playdough can last up to 3 months. Keep it in a cool, dry place to preserve its texture and prevent mold.

I am Sammy and I blog at Live it. Love it. Make it. It is creative lifestyle blog run by best friends H and Sammy. Head over and follow our crafty adventures!